Well its been some time since I last updated this thread so here goes.
As some are aware, my after Racewars situation wasnt too good. The car literally decided to break itself on the trailer ride home which resulted in me not being able to get the car into any gear. After a lovely 35 pt k-turn, I got it pushed into the garage to be looked at another day. What I thought was a clutch hydraulic issue turned out to be something much more significant.
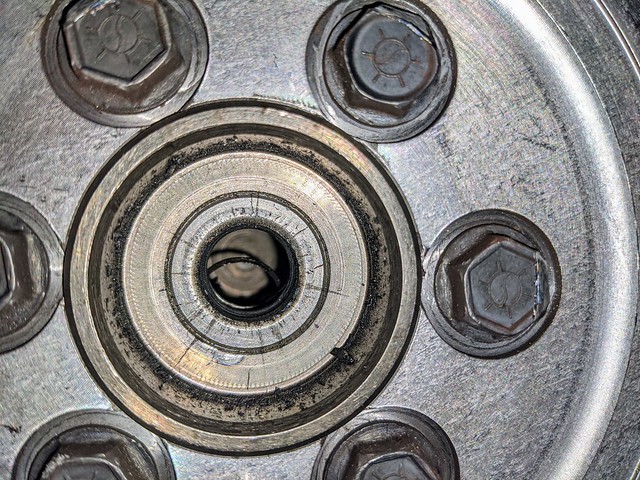
After much debate, the trans was begrudging pulled to see what the heck happened as the issues all appeared to be related to a trashed pilot bearing. Sure enough
..yep.
 Car work
 by
Brian DeLuca, on Flickr
But wait, there was more
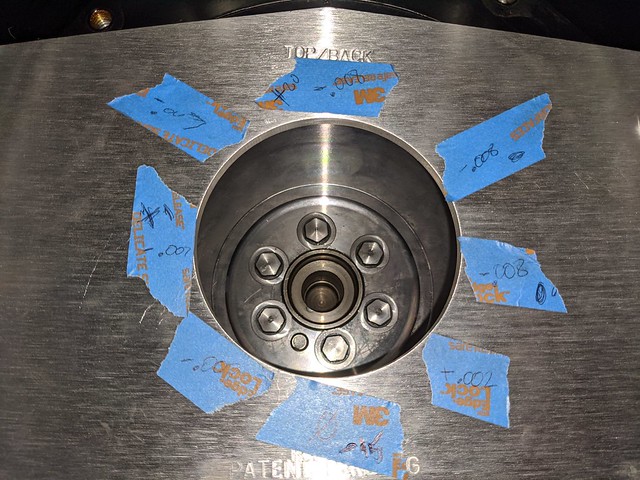
.. as I went to remove the flywheel, I noticed the outside of the flywheel bolts got kissed by the lower clutch disc. Now when this whole setup went together, Monster specifically said to use factory GM flywheel bolts as using anything else (ARP included), will make contact. I noticed a few other questionable concerns with the clutch wear but in the end, Monster made good on the situation and addressed the problem with essentially a new clutch, new bolts (machined) with some changes in the machine work of the flywheel.
 Car work
 by
Brian DeLuca, on Flickr
 Car work
 by
Brian DeLuca, on Flickr
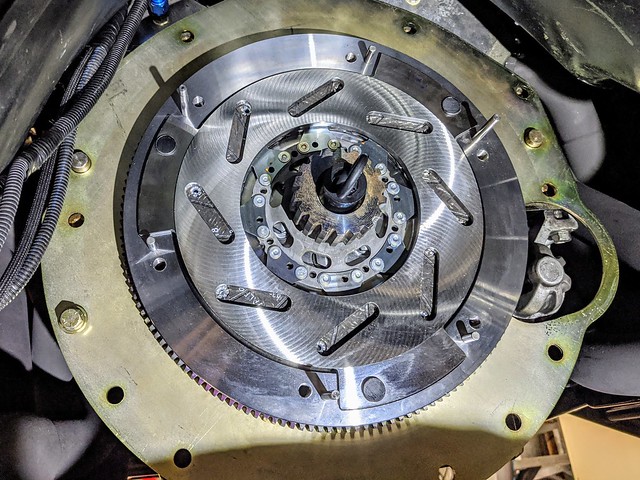
Since the trans was out, I figured it would be good to just have that gone through to avoid a situation where it goes back in and needs to come back out should something be wrong. I thought the issue was caught early enough but oh no, thats not my luck and it turns out a decent amount of components needed to be replaced (input cluster, input shaft, bearings and few other odds/ends). Im glad I had it gone through but my wallet did not appreciate it. There were ideas as to why the bearing failed which could have just been a bad $25 part or perhaps the bellhousing runout was out of spec. After watching all of the videos on this topic (new to me), the pic below is where things ended up and in short, the bell was without spec and no offset dowels were needed.
 Car work
 by
Brian DeLuca, on Flickr
 Car work
 by
Brian DeLuca, on Flickr
New clutch going in.
 Car work
 by
Brian DeLuca, on Flickr
 Car work
 by
Brian DeLuca, on Flickr
 Car work
 by
Brian DeLuca, on Flickr
 Car work
 by
Brian DeLuca, on Flickr
 Car work
 by
Brian DeLuca, on Flickr
 Car work
 by
Brian DeLuca, on Flickr
This time around, I decided to go with a pilot bushing vs the bearing. If the bushing eventually wears out, it doesnt (shouldnt) hurt the trans like the bearing would but I recognize the useful life is shorter. So with that, back goes the clutch and trans. Word to the wise, dont let three engineers attempt to determine shim spacing for the slave. It was definitely the weekend when this was attempted
.
 Car work
 by
Brian DeLuca, on Flickr
Transmission is back in and youll notice there is now a temp sensor in the bottom. At some point, I will have the pump kick on with temperature vs RPM so this sensor will come in handy down the road.
Also while the trans/clutch were out, I thought it would be prudent to replace the oil pan gasket as it has been weeping from the rear and while it didnt leave a drop on the ground, it would make a small mess over time. Prior to the first ride, I did work the clutch and row through the gears while up in the air. All was well so time for a short trip around the block. There is a small loop I take around my area and by the second lap, I had the full James Bond smoke screen coming off the back of the car
..great
I pull in the driveway and leave it running and peak under the car. Sure enough I have oil dripping off of the exhaust.
The next attempt appeared to be a success but I spoke too soon. Everything was looking good on start-up, at temperature, small revs, etc. so time to drive again. I get under and check after a few mile ride and damnit, oil leaking again and while not as bad, its way too much (actively just dripping on the ground).
Now a part of me is confident the gasket replacement didnt go as planned due to the inability to properly prep both sealing surfaces. The pan couldnt be dropped entirely out of the car with the K member in place, so I think the fiddly install likely was the culprit. So now after 2 failed attempts at a gasket replacement, I decide to solve the problem the only way I know how
.spend more money.
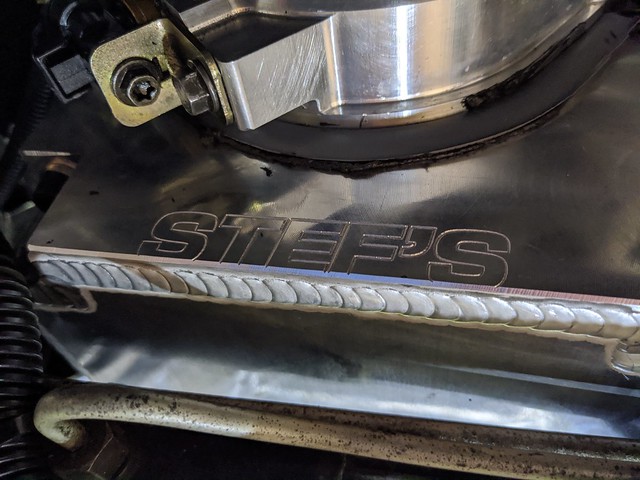
I made a call to Stefs and ordered a new custom oil pan with all the fixings. Some big positives of this pan are a thicker flange for better sealing, larger oil capacity (5.5 to 6.5qts), ability to run my low oil level sensor again, improved oil control and hell, it looks great.
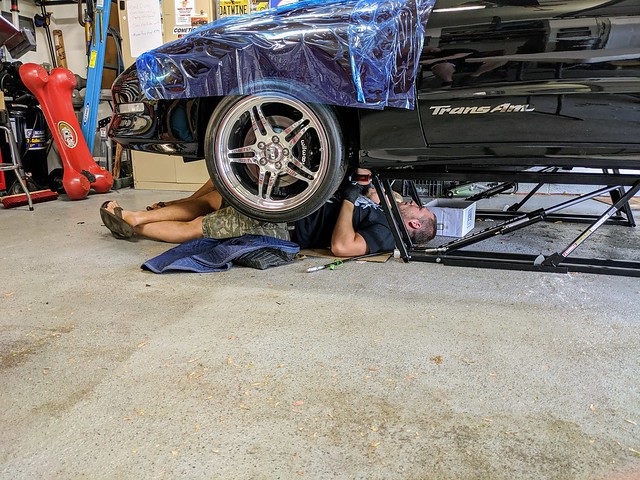
Now to do this install proper, the k-member would need to come down so I grabbed an engine support that sits on the inner fenders. This proved to be a great tool.
So thanks to my great group of friends/family, the old pan came out, new pick-up installed along with the new pan. The engine support worked great and allowed the K-member bolts to be removed and it lowered out of the way enough to sneak out the old pan and install the new. We didnt need to touch the rest of the suspension. Kirk used a unique approach to cleaning off the RTV off the bottom of the block (fire
..). The new pan went up with some right stuff RTV and torqued to spec. K-member went up with whatever is the conversion from air to electric impact ugga duggas.
I fired the car up and so far so good
.or so I thought. Adam noticed that I had a drip of coolant every 10 seconds or so coming off the head gasket (tab showing in between head/block) along with some oil leaking as well (also from between head/block). Yayyyyy
I decide to say screw it and drive the car but after putting 60+ miles on it over a few days and looking underneath, its just too much leaking. The coolant wasnt a big deal to be honest but the oil just doesnt work for me as the car now drips on the floor and the bottom was getting quite saturated. No Bueno. Worth mentioning, the oil leak isnt showing any significant change in the dip stick level but we know even a little oil will make a mess.
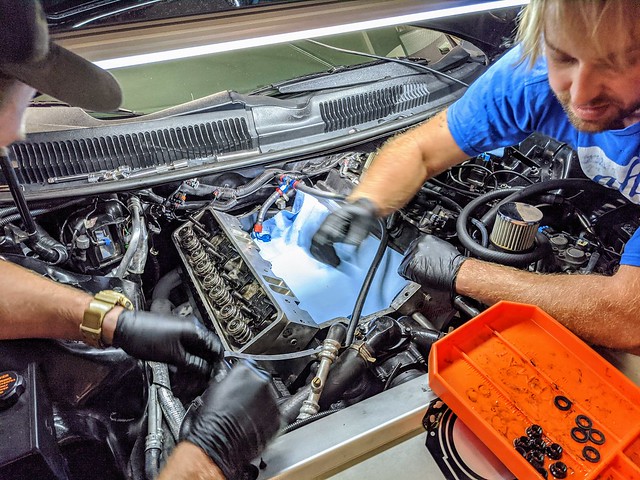
So after a good deal of prep, my friends/family once again continue to appease me and joined for a head gasket replacement party yesterday. Thank god I pulled the trigger on the garage AC because it just wouldnt have gotten done otherwise.
 Car work
 by
Brian DeLuca, on Flickr
 Car work
 by
Brian DeLuca, on Flickr
 Car work
 by
Brian DeLuca, on Flickr
 Car work
 by
Brian DeLuca, on Flickr
 Car work
 by
Brian DeLuca, on Flickr
 Car work
 by
Brian DeLuca, on Flickr
 Car work
 by
Brian DeLuca, on Flickr
 Car work
 by
Brian DeLuca, on Flickr
 Car work
 by
Brian DeLuca, on Flickr
That precision.....
 Car work
 by
Brian DeLuca, on Flickr
I did my best to get the car reasonably prepped before the tear down. In short order, the intake was off and eventually the head revealing nothing significant. Fun fact is that with the A/C removed, the head with studs was able to be removed in car! The pistons looked good, block surface looked fine, head was OK sans a few valves that got a little hot, bores showed a nice crosshatch, etc. The MLS gasket didnt show any blow out but that was expected given the modest issue of the leaking. There was never any mixing of fluids either. Some of the studs could have used a little more RTV but that was about it.
Everything received a good cleaning, MLS gasket coated in copper spray and all studs pulled, cleaned and smothered in RTV. The head went back on and studs torqued in three steps. Unfortunately, just prior to this, one of the stud nuts got misplaced during disassembly which delayed the big show by about 30 mins as we all looked everywhere. Adam eagle eyed the missing nut and off we went.
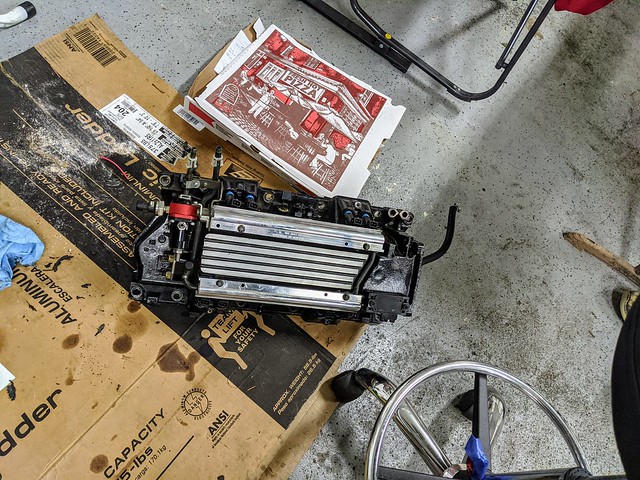
Next came the intake manifold. My RTV bead on the china walls was going beautifully until someone made a well timed joke. If it leaks, we will know why
.
 Car work
 by
Brian DeLuca, on Flickr
 Car work
 by
Brian DeLuca, on Flickr
 Car work
 by
Brian DeLuca, on Flickr
 Car work
 by
Brian DeLuca, on Flickr
 Car work
 by
Brian DeLuca, on Flickr
 Car work
 by
Brian DeLuca, on Flickr
 Car work
 by
Brian DeLuca, on Flickr
 Car work
 by
Brian DeLuca, on Flickr
 Car work
 by
Brian DeLuca, on Flickr
 Car work
 by
Brian DeLuca, on Flickr
 Car work
 by
Brian DeLuca, on Flickr
 Car work
 by
Brian DeLuca, on Flickr
 Car work
 by
Brian DeLuca, on Flickr
So after all that, it was time to start it up. I fired the car up and it didnt sound too good (running lean, not happy). Going back a bit, when the valvetrain was removed, I thought we could cheat and reinstall the rocker locks in the exact same position without readjusting everything. I had confidence but Smash didnt. He was right. The other gents had left as it was well into dinner time but Smash was able to stay longer to re-adjust the valvetrain. Valve cover off, Im rotating the engine under the car and Smash is up top adjusting. Everything is all done and I fire it up
it sounds odd and voltage is low. Cmon!
I take a look at the engine and realize we didnt connect the main passenger side coil connector. OK lets try this again. She fires up and there we go! Much much much better. Voltage is up where it should be and it sounds exactly as it should. I let the car get up to temp and it idles for about 5 mins. Temps never went over 185 and AFR was good. I gave it a couple very minor blips of the throttle and again, it sounds great. Smash checks under the car while its running and doesnt see any leaks so for now, this will do. It was now 830ish so I hastily shoved everything into the corners of the garage so the V could be pulled in.
Job well done by all!!!!
Fingers crossed this is sorted for a while. Ill likely plan some time to adjust the drivers side rockers as that would be prudent and also address a starter wire arc issue thats been around since the battery relocation.
 Car work
 by
Brian DeLuca, on Flickr
Be sure to check out Arizona Speed and Marine for all of your boat anchor parts and accessories

.