it has been a while since I updated this but I wanted to get some work done to show for it before posting individual updates all the time. also I was busy for several weeks installing a very complex drop-ceiling in my basement and running electrical wiring, then installing can-less LED recessed lighting. now that that is done, my attention can swing back to the car projects.
Here is a rundown of where I stand along with some photos. (Don't anybody give me a hard time about the car on concrete blocks, there are also 4 jackstands under there as well. It is mighty well supported. the end.)
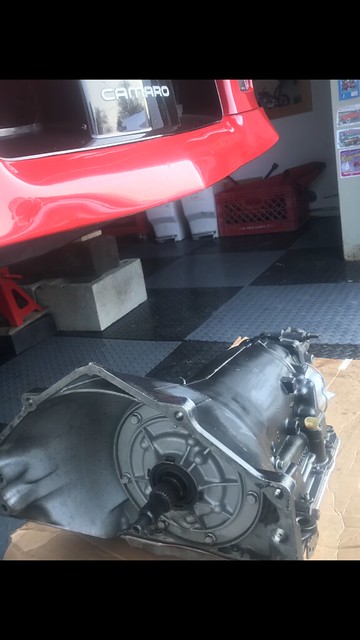
The transmission is still in Georgia, but as of a few days ago the builder had it all disassembled and found a piece of metal that was holding a plunger in place. I'm no transmission guru but he told me that this caused some scuffing on a plate and possibly could have caused the 3-4 clutches to not work properly. While it is there he is installing a few more parts that will make this trans capable of holding 750-800 flywheel horsepower.
 IMG_0522
 by
David Martin, on Flickr
 IMG_0482
 by
David Martin, on Flickr
 IMG_0746
 by
David Martin, on Flickr
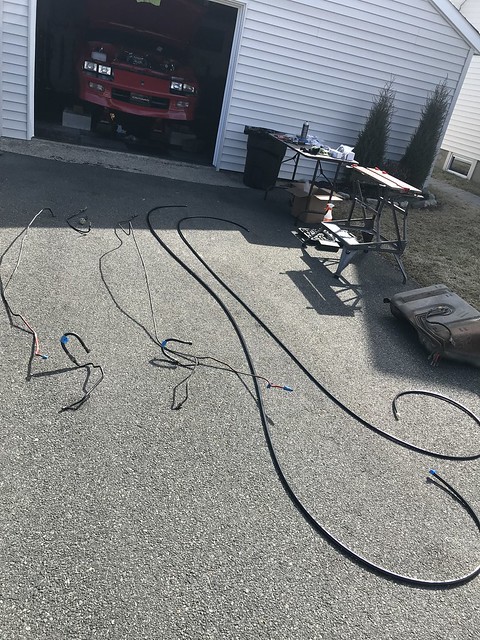
I decided that since I was taking out the fuel tank to install the 340lph pump, as well as doing the larger wiring upgrade, I might as well increase the fuel feed/return lines and go with braided. After emails with Holley, aeromotive, racetronix, etc etc I was told that the Holley Hydramat would not work with my desired pump/tank/pickup setup. I then put that $200 I was going to spend on the Hydramat towards buying the braided lines and -AN fittings.
 IMG_0604
 by
David Martin, on Flickr
I got everything from Racetronix, and with Jacks help, we compiled a long list of parts, fittings, wiring, and so forth to get me a kick-ass fuel system. I am keeping the stock tank, hanger, sending unit, float, and bulkhead, but aside from that, everything will be new (and better) leading up to the TPI setup. Since the TPI setup will be getting removed when I do the engine project next year, I just used adapters to go from the -AN lines to the saginaw fittings near the TPI rails.
 IMG_1153
 by
David Martin, on Flickr
 IMG_1225
 by
David Martin, on Flickr
The fuel line is P.T.F.E. Teflon lined, stainless steel braided, and then coated in a snazzy composite coating. this is great for under the car and easy to wipe down, but I may peel off the coating on the hose that is visible in the engine bay to expose the fancy braided steel lines. maybe next year though
http://www.racetronix.biz/itemdesc.a...70-08B&eq=&Tp=
I went with -8an (1/2") line for the feed line and -6an (3/8") for the return line. I am leaving the vent line as is from the factory at this time.
Fittings are P.T.F.E. style and I have to assemble each fitting onto the hose after determining the hose length. There are an assortment of adapters too. Everything is black anodized and so far all are going on well.
http://www.racetronix.biz/items.asp?...atus=0&Tp=&Bc=
 IMG_1231
 by
David Martin, on Flickr
 IMG_1232
 by
David Martin, on Flickr
The pump is a Racetronix RXP340E which will actually flow closer to 380lph with the upgraded wiring kit (so I was told)
http://www.racetronix.biz/itemdesc.a...XP340E&eq=&Tp=
I also got their billet fuel filter which uses a removable filter element that is also magnetic. installed it with their billet filter mount as well.
-the pump, lines, wiring, filter, fittings etc are all E85 capable too, and not that I plan on running E85 but it is nice to know I could have the option to do so.
 IMG_1243
 by
David Martin, on Flickr
 IMG_1247
 by
David Martin, on Flickr
 IMG_1267
 by
David Martin, on Flickr
 IMG_1271
 by
David Martin, on Flickr
the wiring upgrade they make can certainly be built by hand to save money, but I decided to get everything I needed for wiring pre-built from them.
http://www.racetronix.biz/itemdesc.a...WH-005&eq=&Tp=
http://www.racetronix.biz/customkiti...CWA-FL98HD&eq=
http://www.racetronix.biz/itemdesc.a...WH-002&eq=&Tp=
I am about 50% done with the fuel system project so far; need another full day to probably complete it. Then the tank can go in and I can check that the pump primes and there are no leaks.
****QUESTION, if i don't have a transmission or rear end in the car, but the engine is in, would it be possible or problematic to test the fuel system and crank the engine over to let it run for a short moment? again, no transmission, torque converter, exhaust from the y-pipe back, no driveshaft, rear axle. thoughts? I simply want to make sure the fuel system is functioning and re-set the fuel pressure via my Holley fuel pressure regulator at the TPI.. prior to reinstalling the exhaust, axle, rear suspension etc. Could this damage anything at all or cause a problem in any way shape or form ??
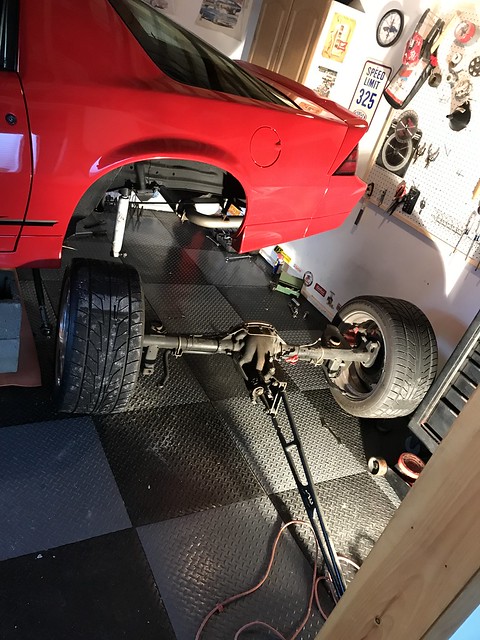
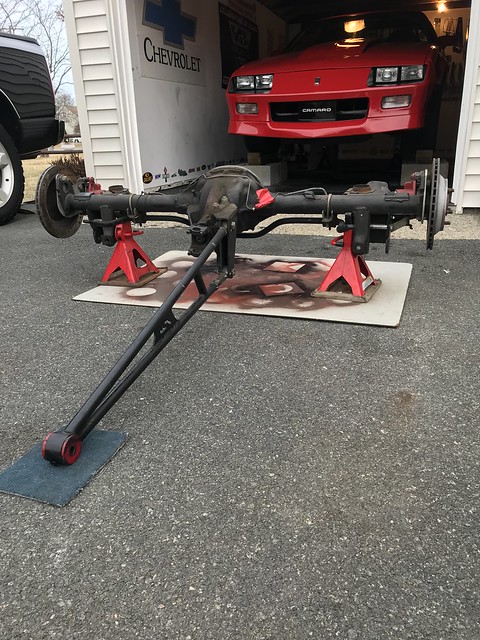
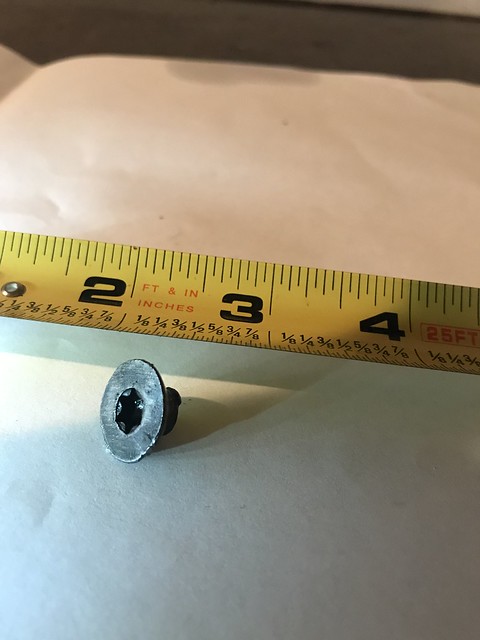
the rear axle will be staying as is for now. I did decide to get some slightly longer wheel studs so that I could feel comfortable by having a full 7or8 turns of thread engagement on my rear wheels. While taking the axles out I was stopped dead in my tracks at finding a very odd sheared off bolt head lying in the bottom of the axle carrier. the fluid was dark and slightly metalic, but there was this small head of a sheared off bolt. It is a tapered head that looks to have been installed via a torx. I spoke with some experts on this board and online and nobody seems to think it ever belonged to anything inside my specific axle. The last three times (in the past 6 years) this rear has been opened up was by me and me alone. I did not put it there and do not recognize it. The rear is original to this car minus the richmond 3.73's. So it is a 10 bolt, 26 spline, series 2 carrier, G80 RPO code rear. Anyone have any oddball thoughts about this bolt head (seep photos)
--Regardless, I will be putting in the longer wheel studs and putting it all back together in hopes that I can get many more miles out of it this year. In the long run I will need a better rear and driveshaft to handle the big power for next years engine project, but I don't have and extra $4,500 for a 12 bolt and new driveshaft at the moment. I am hoping this 10 bolt lasts a while and in the meantime I can save up, buy a 12 bolt and keep it off to the side in the garage in case this rear fails suddenly on me.
 IMG_0780
 by
David Martin, on Flickr
 IMG_0783
 by
David Martin, on Flickr
 IMG_0758
 by
David Martin, on Flickr
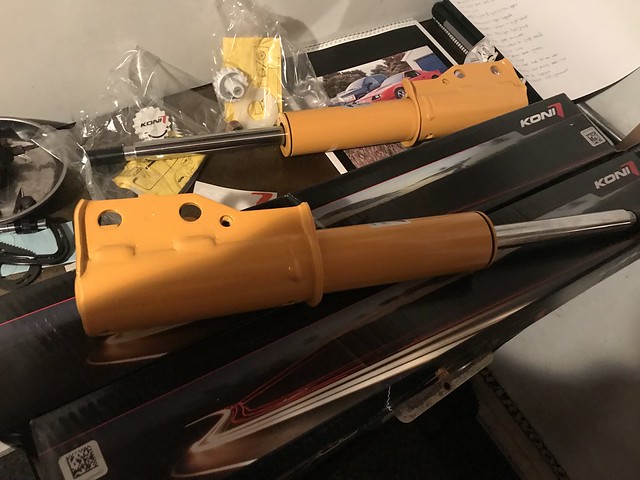
My Koni yellow struts and shocks have arrived and will go in when I reassemble everything.
My MSD ignition box is back from having two failed transistors replaced and tested by MSD.
 IMG_0344
 by
David Martin, on Flickr
 IMG_1039
 by
David Martin, on Flickr
feel free to share comments, concerns, good or bad feedback, or advice.
for the full album of photos, here is a link:
https://www.flickr.com/photos/123927...h/40564295751/