I had considered posting about this back in the wintertime, but I decided to wait until the project was actually complete instead since it's not really a car "build" thread, but more of just garage wall art.
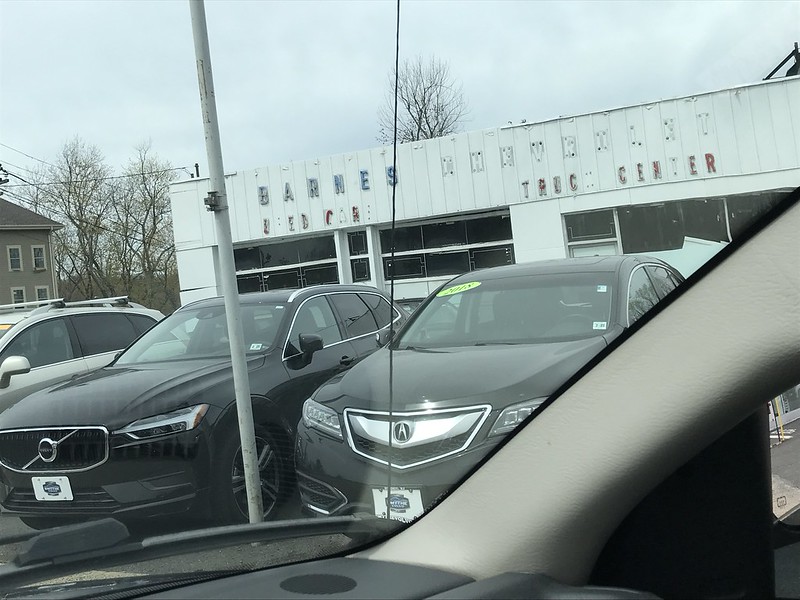
So where I grew up (New Providence) the closest Chevrolet Dealer was BARNES CHEVROLET over in Summit NJ, actually the town both of my parents grew up in. It was cool as a kid to drive past the place and see the row of shiny new cars on display and for sale. Growing up, a few of my uncles were chevy motorheads and racers so, I became one too. In 2000, When i got my car at the age of 15 the internet wasn't a big thing and I didnt know any better than to source parts at Napa or Van Iderstines, or for stock stuff, I would go over to Barnes Chevrolet and buy stuff at high dealership prices. Only a few years later, Barnes Chevrolet (which had been in business there since sometime in the 1960's from what I learned from locals) shut down, and was sold and became Summit Chevrolet. After a few years, the Summit Chevrolet closed, and the building went vacant and the property sat lifeless for a while. At one point during a wind/snow storm I drove by and noticed that one of the large light up signs that was on top of the big building had detached itself and had came crashing down to the ground (about 30 feet). the metal housing, inner bulbs were destroyed, but the hand painted CHEVROLET bow-tie sign portion survived with only a "small" semi-circle portion of it busted out. The sign sat there for a week, right by the side of the road, and eventually I stopped and grabbed it. I dismantled the busted frame, electrical parts and just kept the front hand painted sign. I have been told that this sign was probably painted in the 1970's.

But, As a kid I had always thought the vintage lettering on the buildings was cool, so I wanted to figure out a way to get some of it. I thought I had an ace up my sleeve when a Volvo dealership bought the property, figuring that they were going to strip all the Chevrolet lettering off of the two buildings and then I could have it all. in 2011 or so, I went into the Volvo dealership and asked them, and was told "Sorry, but we want to restore the smaller of the two buildings to be a time-capsule of years gone by, so the lettering must stay". I was pretty upset, especially since as the years went on, nothing went on with restoring the building and the lettering at at the top just sat there. The volvo guys decided to put painters tape on the lettering to protect it from the sun(??) which it had been out in the sun for decades already...(?!?) I would email the Volvo dealership every two years or so and get the same old story....

..until this winter when to my surprise they responded to my email that they were probably never going to get to restoring the small building so I could have the letters. They told me to come pick them up. When I got there I was pretty disappointed to find that the letters weren't as thick and hefty as I had envisioned, and that while the volvo guys were taking them off of the building, they must have just used a freakin pry bar and mallet or something, because they broke off a lot of the mounting bosses, and cracked some of the letters so badly, that there were chunks of plastic missing. At that point I was doing my engine project on the car so I decided to put the letters away until I could figure out if they were salvageable.


I discussed the options with my dad, and we decided to try to repair them. I initially thought the letters were from the 1980's but a bunch of locals tell me that the lettering was era correct for the 1960s, adn some remember being at barnes Chevrolet durign that timeframe and seeing the buildings setup that same way! So first step was to strip off all the hardened glue and painters tape off the surface. that was a nightmare. Took about 6 hours and lots of chemicals and plastic razor blade action.

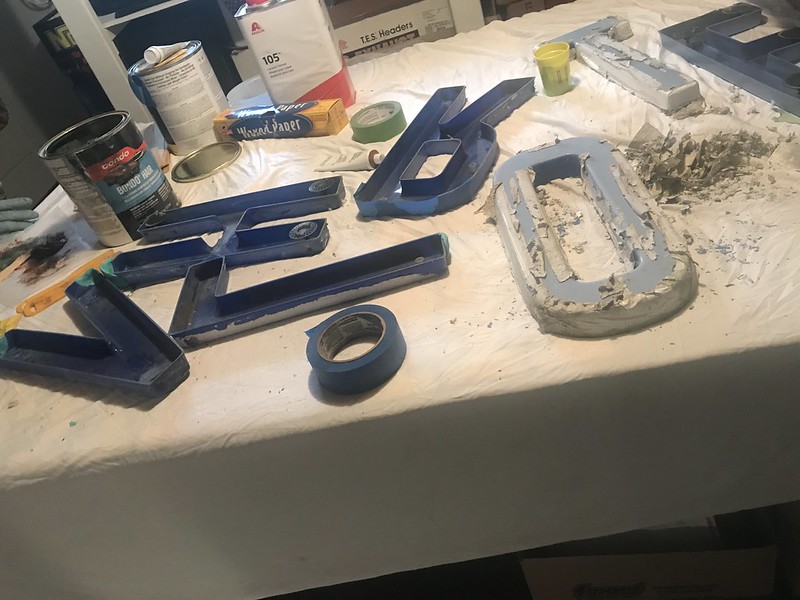
We then used fiberglass hair and started to shape in sections of the missing chunks of plastic. After that hardened, 3 different coats of filler and much sanding to shape the letters.

Primer
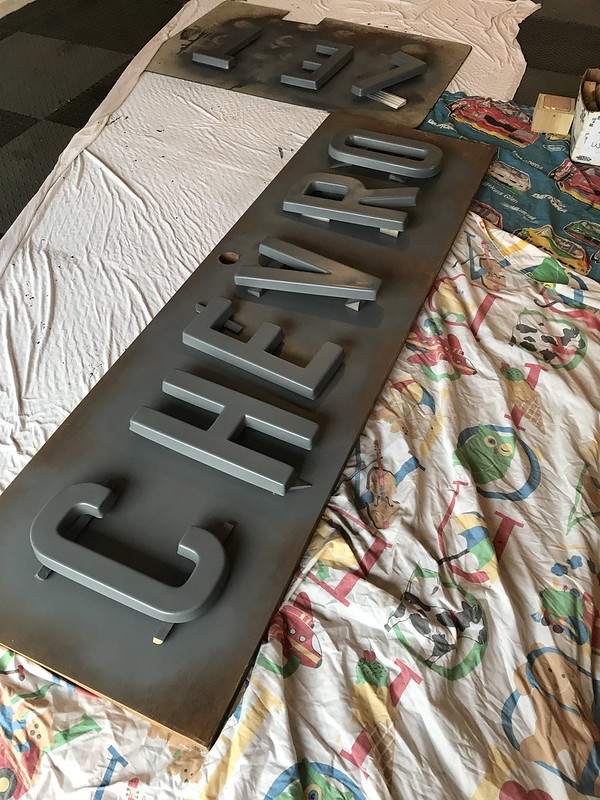
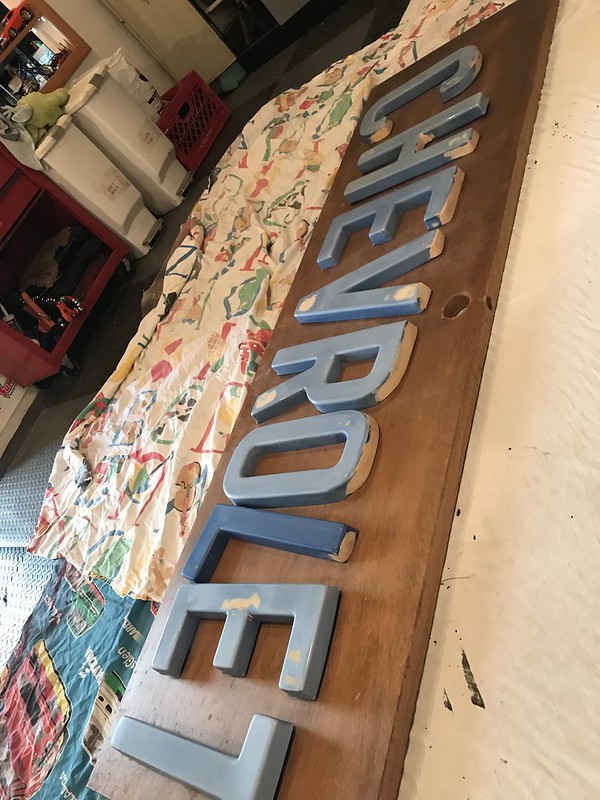
and 3 coats of paint, in the closest rattle can blue color that I could find to what the blue color the letters originally were. Followed by two coats of clear.

