 |
|
 05-06-2015, 01:38 PM
|
#76
|
|
Ebearnezer Scrooge/Power Member/Lips
Join Date: May 2006
Location: Hamilton, Mercer county
Posts: 4,141
|
Not really anything to speak of since I finished the dash lighting. I am going to take it to get the windows tinted this weekend, should help a lot with the summer heat through the back window.
I have also been collecting parts for the swap(s). I refinished and rebuilt a set of LS1 front calipers, painted them yellow. I am going to get all that built on the spindles so I can do the front suspension in just a few hours, I have a different set of front control arms to put in that have new bushings and ball joints, the ones in the car are getting bad. The car wanders a little more on the bumpy and rutted roads than when I first started driving it. While I am at it, I am going to put in the DZ springs I have and see if it levels out the car a little, and put the larger sway bars, I have a 36 and 24/25 to put on the car. I am going to paint them to match the calipers.
I also pulled in the 9 bolt from my 91 so I can paint and re-seal, and add on a set of the late/LT1 rear disc brakes since the rear brakes actually don't work at all right now. I want to get the rear changed and the front suspension all done in one shot since it my primary daily driver still.
The transmission mount is also fully shot now, when I go around a LH turn fast the front weld yoke on the DS rubs the edge of one of the cat heat shields. I bent that out of the way so it doesn't do it too much.
Have to finish some other projects and then complete the mockup of the LR4 swap. I have to cut up the Spohn crossmember I have from a different transmission to make the LS1 T56 work in the car and cut/weld the Dynomax (I think) stainless Y pipe to work with the factory LS1 manifolds I plan on using. When I finally do the engine swap I want to fix a small spot of rust on the cowl and repaint the entire engine compartment. Hopefully I have everything done for an early fall timeframe.
This past weekend I took my old 91/92 spoiler off the window in hopes to put that on the car, but all the mounting points on the spoiler are broken, so that will be a project for another time. I was going to take that glass to get tinted and then swap that onto the car so the clips were already there and I could paint the spoiler and deck. Eventually I will either try to fix that wing, or I will just get the Hawks reproduction and put that on instead.
In the mean time, I have been working on a 69 Suburban C10 that I am putting in Classic Auto Air and toward the end of summer I want to make it a K30. I got an 88 GMC K30 for the axles and transfer case. It is also a 6.2 Diesel and I want to put that in instead of the later model 454 that gets about 11mpg. I wasn't going to use the diesel, but since I didn't spend any additional money to get it I won't have to spend much to swap it for the BBC. Hoses, new belts, gasket set and a flywheel are the things I have to buy, but I may put a little money in it.
I got the factory heater setup out and the smooth firewall parts put on already and holes drilled for the heater and AC tubes. I have to finish the carpet and sound deadener/vibration damper install, then carpet and I can finish up the air install.
|

|

|
 05-13-2016, 07:41 PM
|
#77
|
|
Ebearnezer Scrooge/Power Member/Lips
Join Date: May 2006
Location: Hamilton, Mercer county
Posts: 4,141
|
Looks like the car ate a freeze plug in the back of the 3.1 engine. I'm not going to fix that, so the 4.8 and T56 are going in. I just have to make up my Y pipe for the exhaust and the swap should go pretty quick. The engine and trans are already in the "Fire"bird and I have a Magnaflow Y pipe for a TPI engine, so I really just need to cut the ends off and re-weld them on at the proper angle to the 4th gen F-body flanges and I should be good. I have been collecting parts for this for a long time.
I wanted to fix a bunch of other stuff on the car when I did the swap, but I don't want to drive my BBC Suburban to work for too long, so I am just going to get the swap done quick and I will have to fix the small amount of rust later.
Monday I am going to drop the T56 off to Hanlon for a rebuild before I put it in the car.
|

|

|
 05-14-2016, 09:29 PM
|
#78
|
|
Ebearnezer Scrooge/Power Member/Lips
Join Date: May 2006
Location: Hamilton, Mercer county
Posts: 4,141
|
My friend came over and helped me, got this far today. Most of the exhaust is out, console, shifter. I also got the T56 out of the other car so I can load that to take to Hanlon
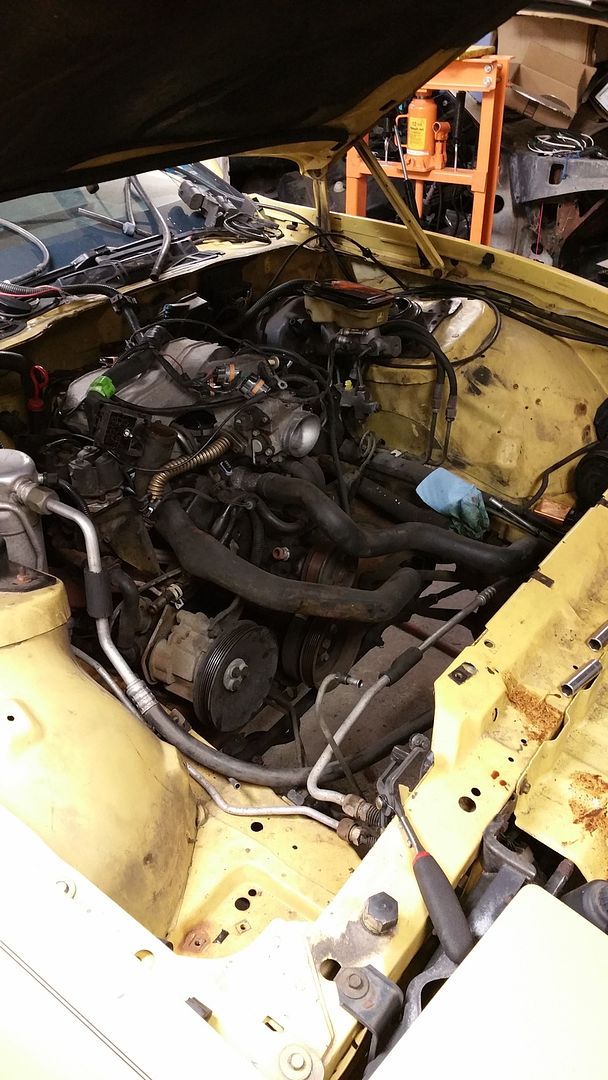
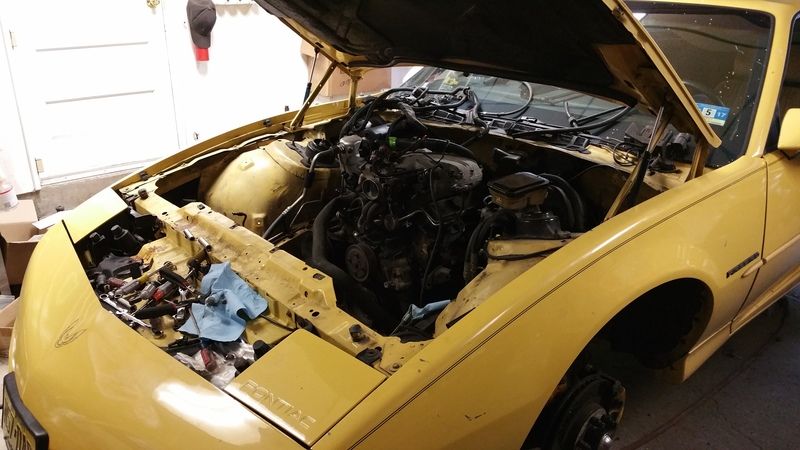
I also changed my mind, I will fix the rust and repaint the engine compartment. I also ordered DSE subframe connectors, looks like I will be taking the interior apart too.
|

|

|
 05-14-2016, 09:56 PM
|
#79
|
Join Date: Nov 2011
Location: Manalapan,NJ
Posts: 216
|
love this color. Nice to see another 92 in this area
__________________
92 Firebird (First Car  SOLD 2/18/17)
90 Firebird Formula 305 T5 Daily Driver (SOLD)
87 GTA Gunmetal RIP 
1984 Trans Am 6.0 4L60E , Ford 8.8 3.55 gears
1991 Trans Am
1985 Iroc Z
2015 Silverado 2500HD
|

|

|
 05-15-2016, 07:08 AM
|
#80
|
|
Power Member/NJFBOA Bookie/Moderator
Join Date: Jun 2009
Location: North Jersey = Best Jersey.
Posts: 4,435
|
Good to see you back at it, Bear. 
__________________
 1995 Firebird... Stock-ish.
Quote:
Originally Posted by LS1ow

Good. He microwaved my phone 6 years ago, i hope his intake erupts.
|
|

|

|
 05-15-2016, 06:10 PM
|
#81
|
|
Ayatollah of Rock N Rolla / Admin
Join Date: Mar 2006
Location: Parts Unknown
Posts: 12,573
|
Quote:
Originally Posted by PolarBear

My friend came over and helped me, got this far today. Most of the exhaust is out, console, shifter. I also got the T56 out of the other car so I can load that to take to Hanlon
I also changed my mind, I will fix the rust and repaint the engine compartment. I also ordered DSE subframe connectors, looks like I will be taking the interior apart too.
|
How bad is the rust? The car looks pretty solid.
|

|

|
 05-16-2016, 06:25 PM
|
#82
|
|
Ebearnezer Scrooge/Power Member/Lips
Join Date: May 2006
Location: Hamilton, Mercer county
Posts: 4,141
|
The under side of the car has some pre-cancer. It's not terrible, but if I don't treat it and a few other spots, wheel opening pinch welds, the cowl/firewall from the inside and there is a tear in the firewall near the windshield so it must have been in an accident. When I pulled the pass side carpet to get at some screws there the insulation was wet, so the floor may be rusty from the inside too. The fuel and brake lines are pretty rust at the back, but I already have stainless ones to put on.
I decided to go with the DSE SFC's, they require some cutting of the floor, that will eliminate some of the rust underneath anyway so it will kill two birds with one stone.
Last edited by PolarBear; 05-16-2016 at 06:26 PM.
|

|

|
 06-01-2016, 09:04 AM
|
#83
|
|
Ebearnezer Scrooge/Power Member/Lips
Join Date: May 2006
Location: Hamilton, Mercer county
Posts: 4,141
|
Well, I was working towards installing my DSE subframe connector on the passenger side and found a little rust in the rocker. I was already aware of some slight surface rust on the floor board on both sides and this stopped my Spohn SFC install previously. Since the DSE ones have you cut the floor out I figured this was a great way to negate that rust. Further inspection showed that this car had been in an accident in the past. The fender support rail is pushed back maybe 3/8" and a piece of sheet at the windshield is torn. There are also some seams that are separated in that area and have let water into the cowl on the inside of the car. I am guessing this is where my rust in the rocker is from, the rust is around the welded nut that the lower fender is bolted to. I will have to cut all that out, treat inside, and put new metal.
Since i had the interior all apart anyway I started looking around at the drivers side. There is a large rot hole in the area where the starter relay is on the kick panel, much worse than the other side. After I am done with the rust repair and all the SFCs, I am going to paint the entire underside of the car and do a lot more seam sealer, I do not want this to happen again.
It just sucks that a freeze plug in the 3.1 has lead to a complete tear down and finding so many problems. At this point the only thing that will be attached to the body will be the hatch during the tear down. I plan on removing everything in the engine compartment for paint, the interior had to come out for the SFC's and fuel pump access weld/closeup and the dash is out since it would be too difficult to repair the cowl area with the dash in place. I will also do some "upgrades" while it is all apart. I will do some vibration damping and additional sound proofing, probably new carpet, headliner re-covered since my was falling, the dash and interior panels will get foam all inside and between parts so it doesn't rub/squeak. I will also re-wire the back up lights and the starter relay since I am going from an auto to a manual and I like everything to work like factory. I also have an idea to put some LED's under the bottom of the door that illuminate with the dome light, like a newer car, which I also think is a good safety item since i like to park in the street. I also want to do some LED's behind the door handle that will illuminate and hold for a time period, activated from the unlock signal from my car alarm. Another upgrade I plan is a heavy 10 gauge wire and relays to work the windows. I had replaced the motors when I bought the car and they were much faster than any other 3rd gen I had owned, so relay control and heavy power wire should make them amazing, I think I am also going to get and express module so I can have the alarm roll the windows down.
I also bought some new speakers since I was running the factory ones still. I have the TDS greasable hinge replacements and I have to buy some new detent rollers, the drivers one is so bad it makes the door difficult to close sometimes.
|

|

|
 08-29-2016, 01:03 PM
|
#84
|
|
Ebearnezer Scrooge/Power Member/Lips
Join Date: May 2006
Location: Hamilton, Mercer county
Posts: 4,141
|
|

|

|
 08-31-2016, 10:03 AM
|
#85
|
|
American Road Warrior

Join Date: Jul 2005
Location: Wastelands of NJ
Posts: 6,116
|
Cooooool!
__________________
unstable bob gable: LEGENDARY LEGEND,
ICONIC ICON, AND AMERICAN BAD AZZ!!!
1991 Dodge Spirit R/T: Gran'pa lookin' 150+ mph turbo rocket.
2013 Dodge Avenger RT: Wastelands cruiser.
2008 Crown Vic Police Interceptor: 'Nuff said!
THE ONLY THING THAT SUCKS WORSE THEN IMPORTS ARE RICED OUT IMPORTS!!!
|

|

|
 09-05-2016, 09:29 PM
|
#86
|
|
Ebearnezer Scrooge/Power Member/Lips
Join Date: May 2006
Location: Hamilton, Mercer county
Posts: 4,141
|
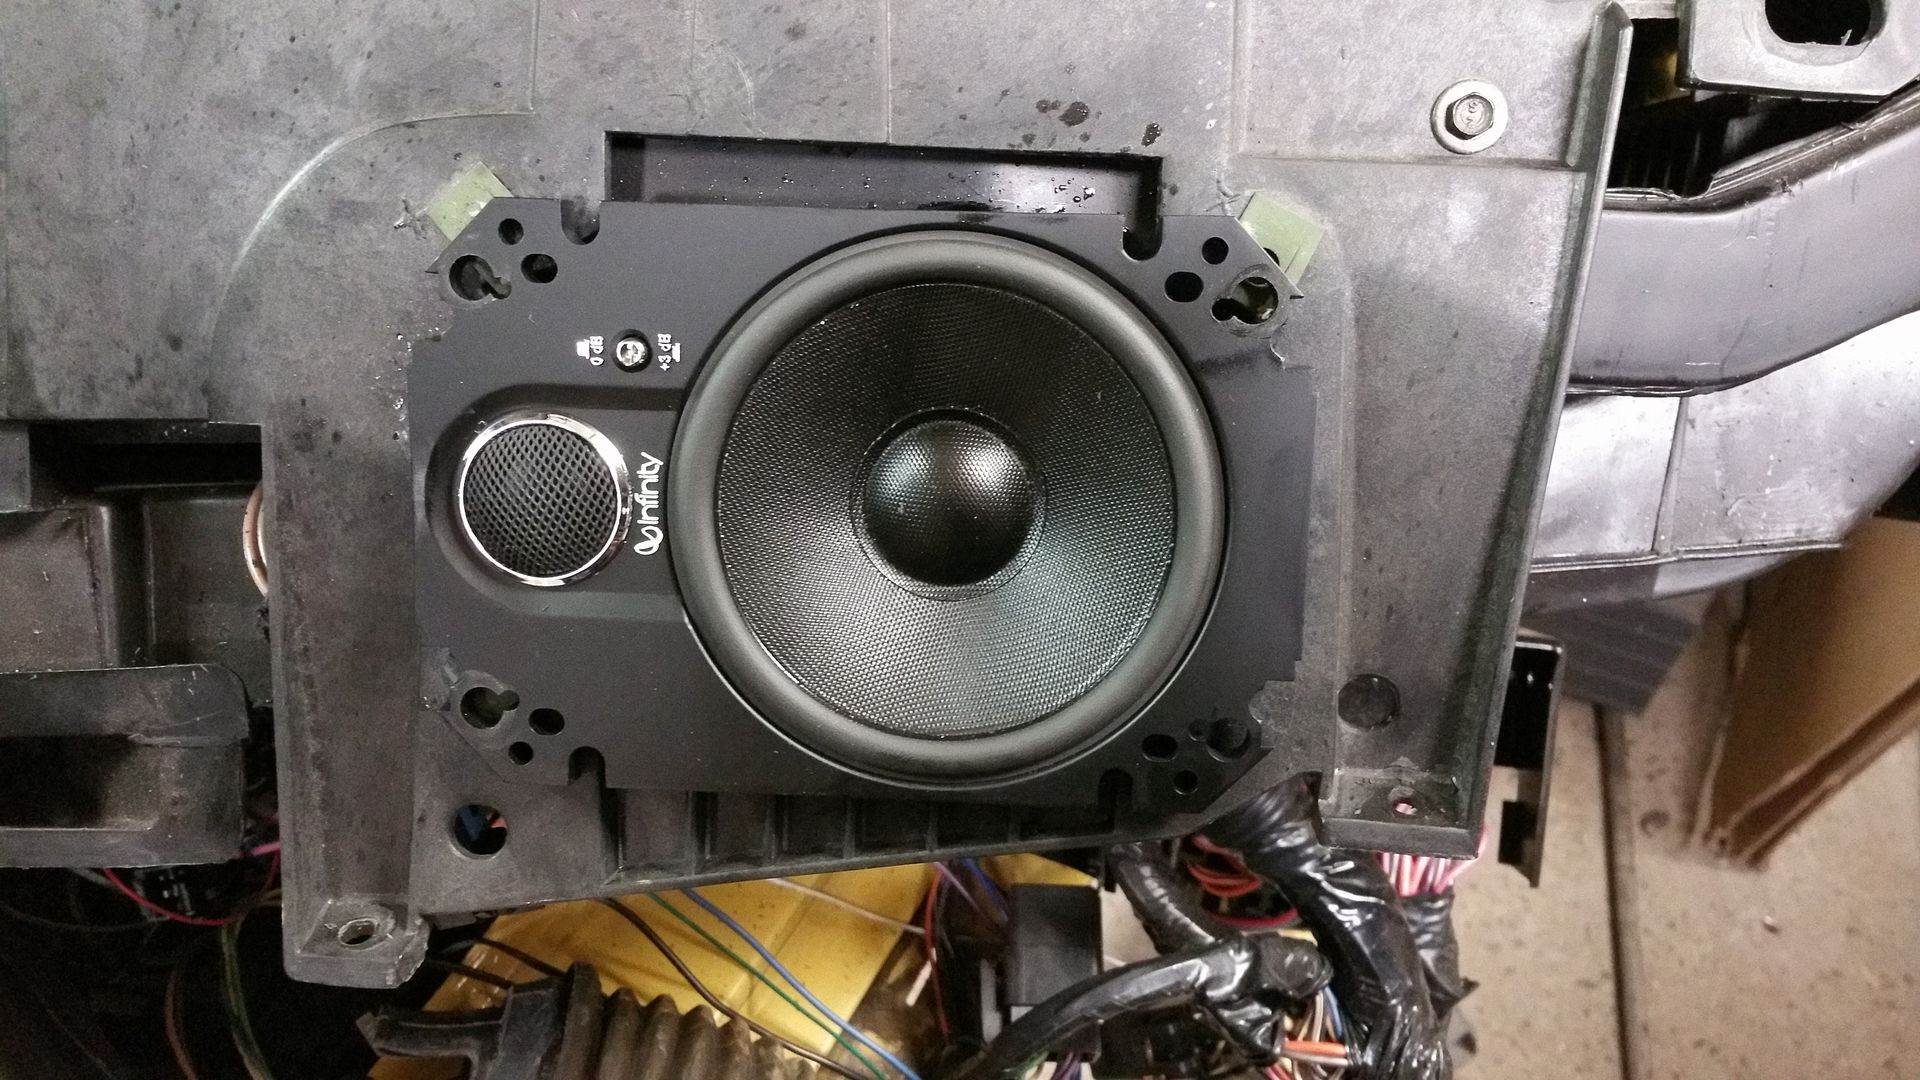
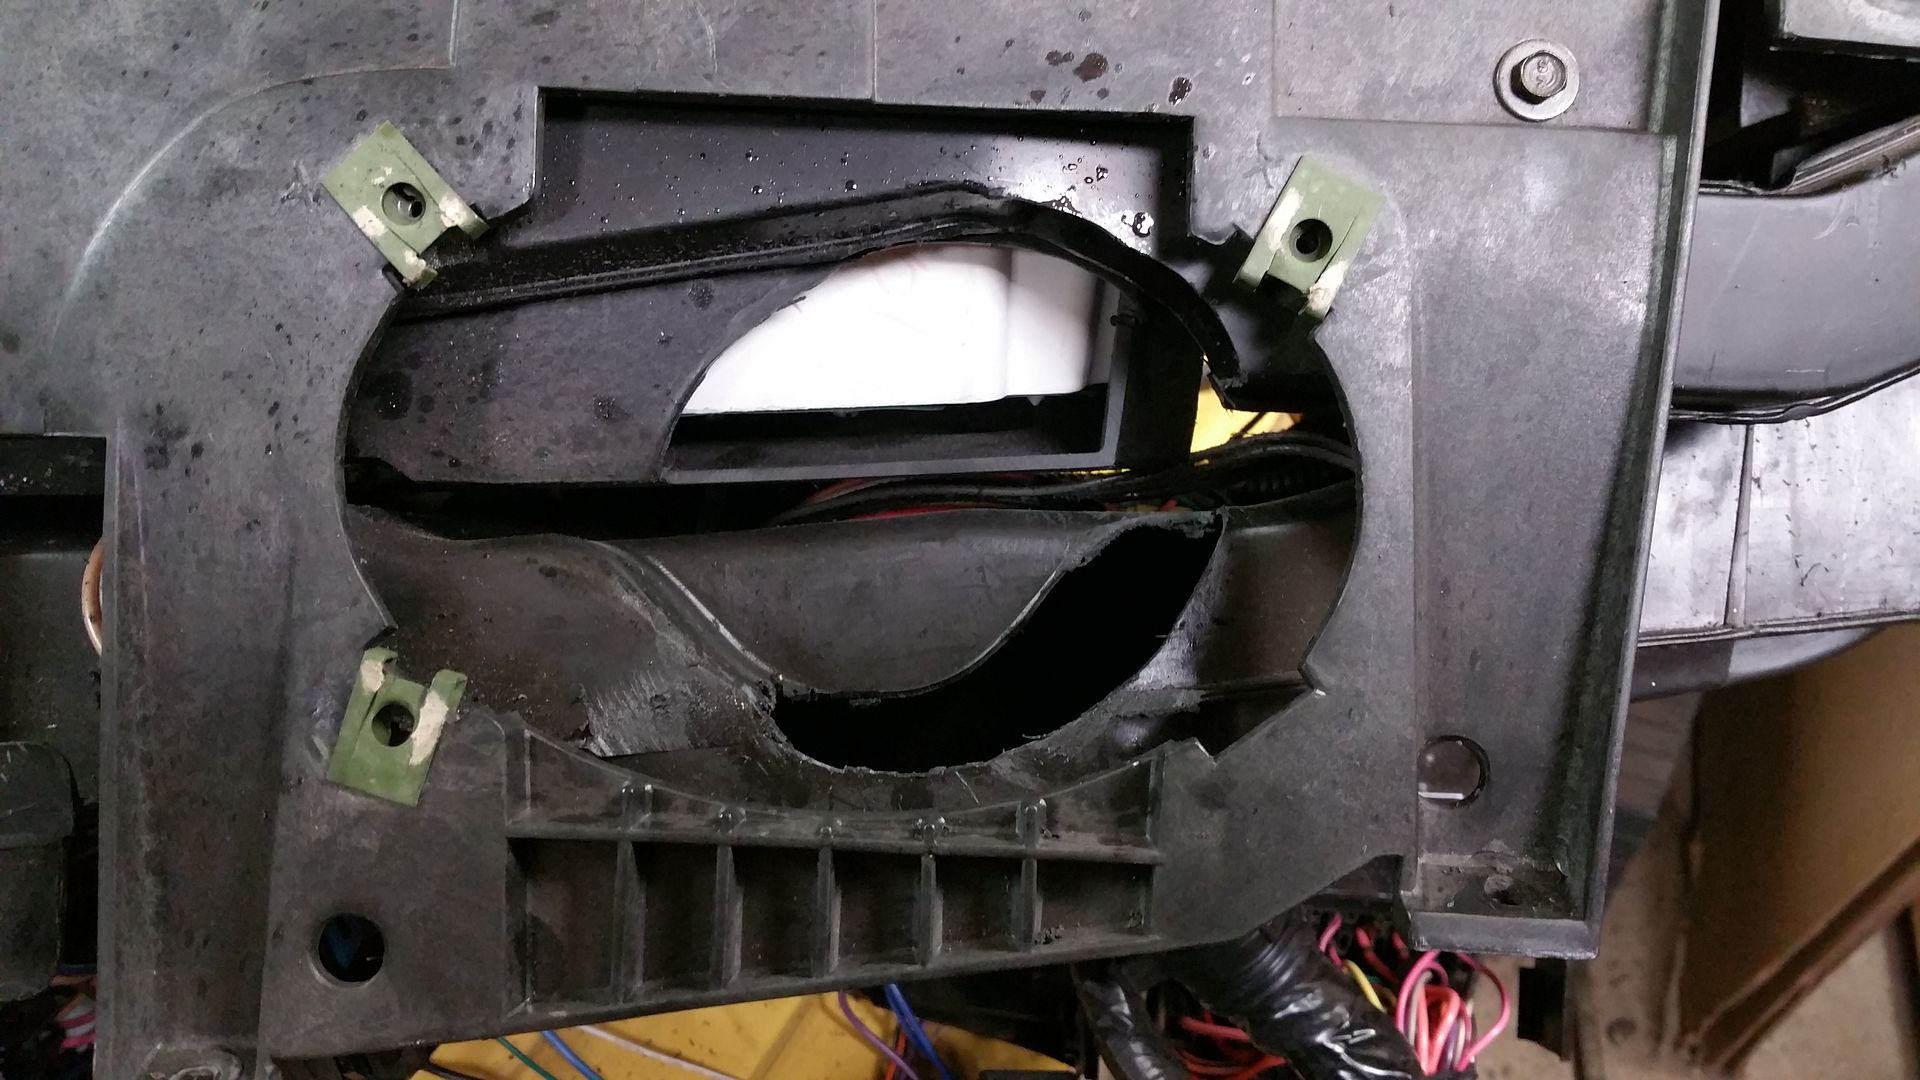
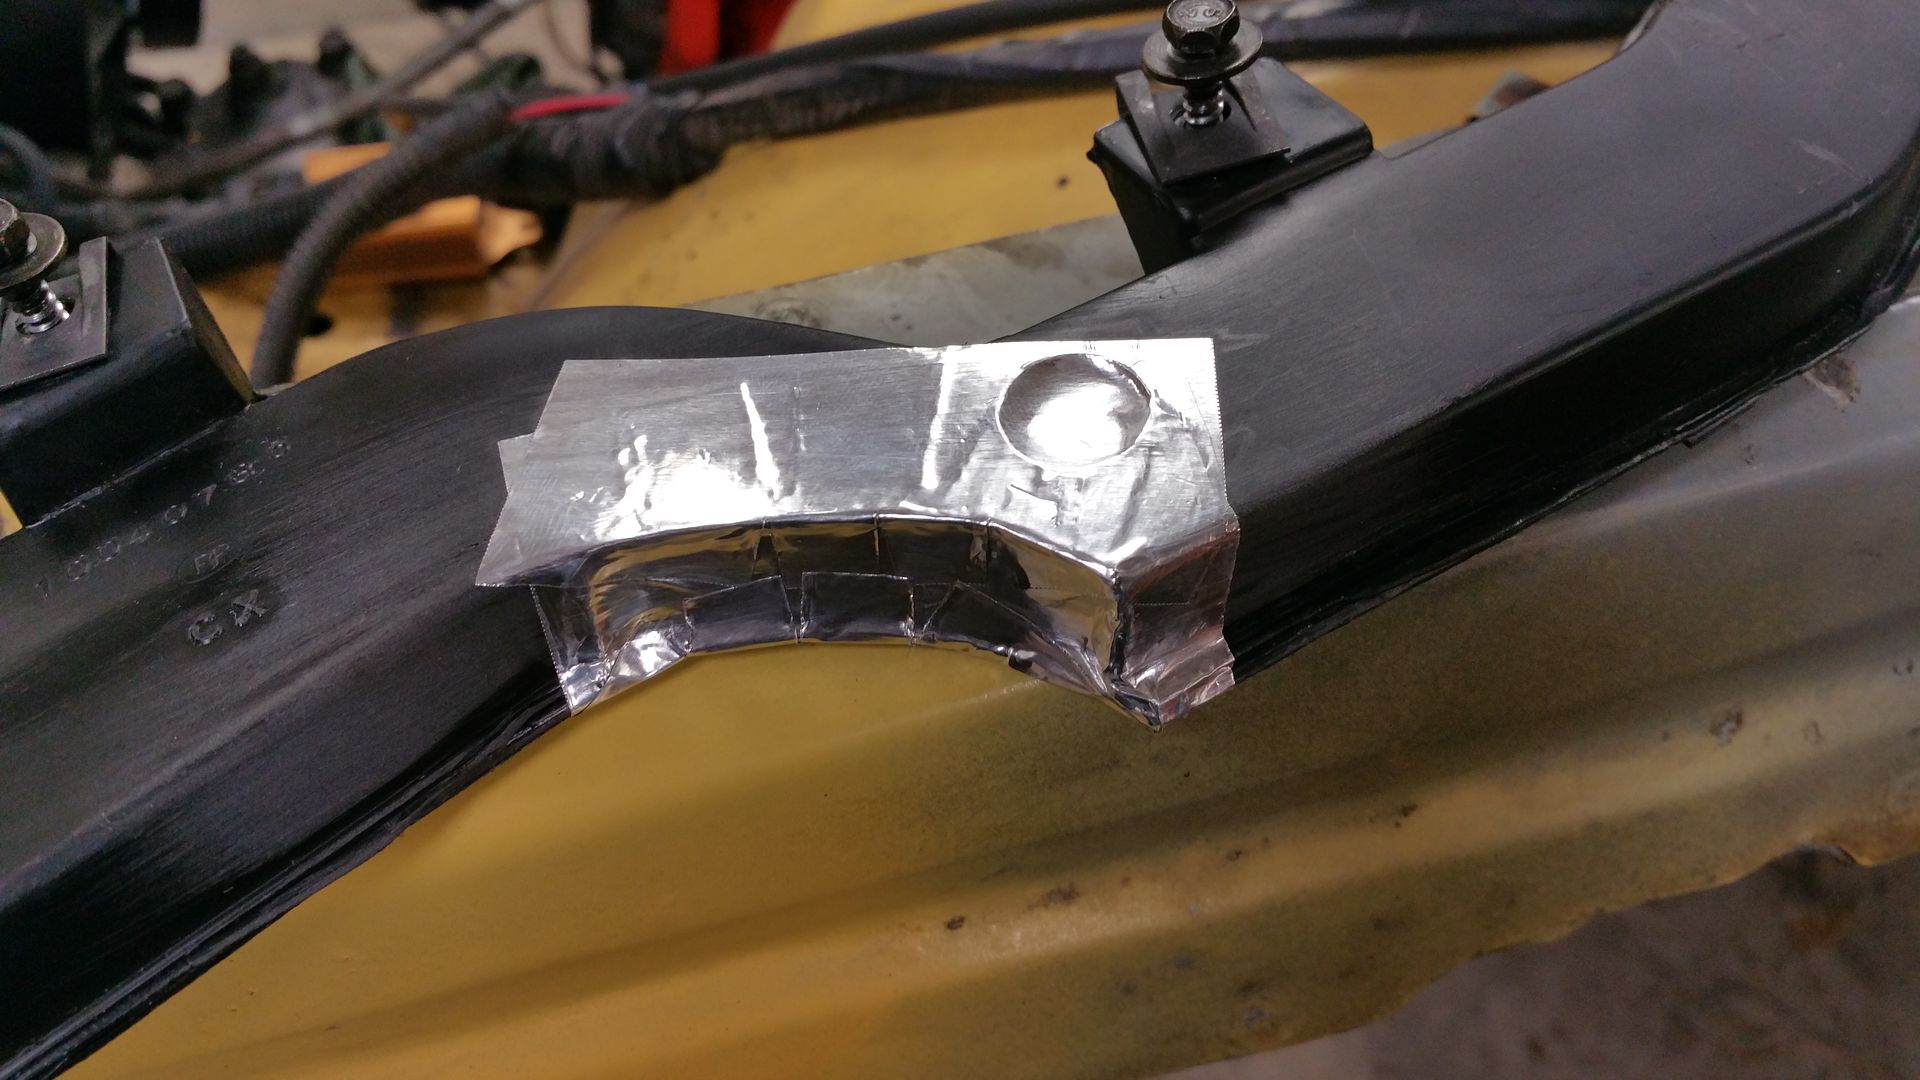
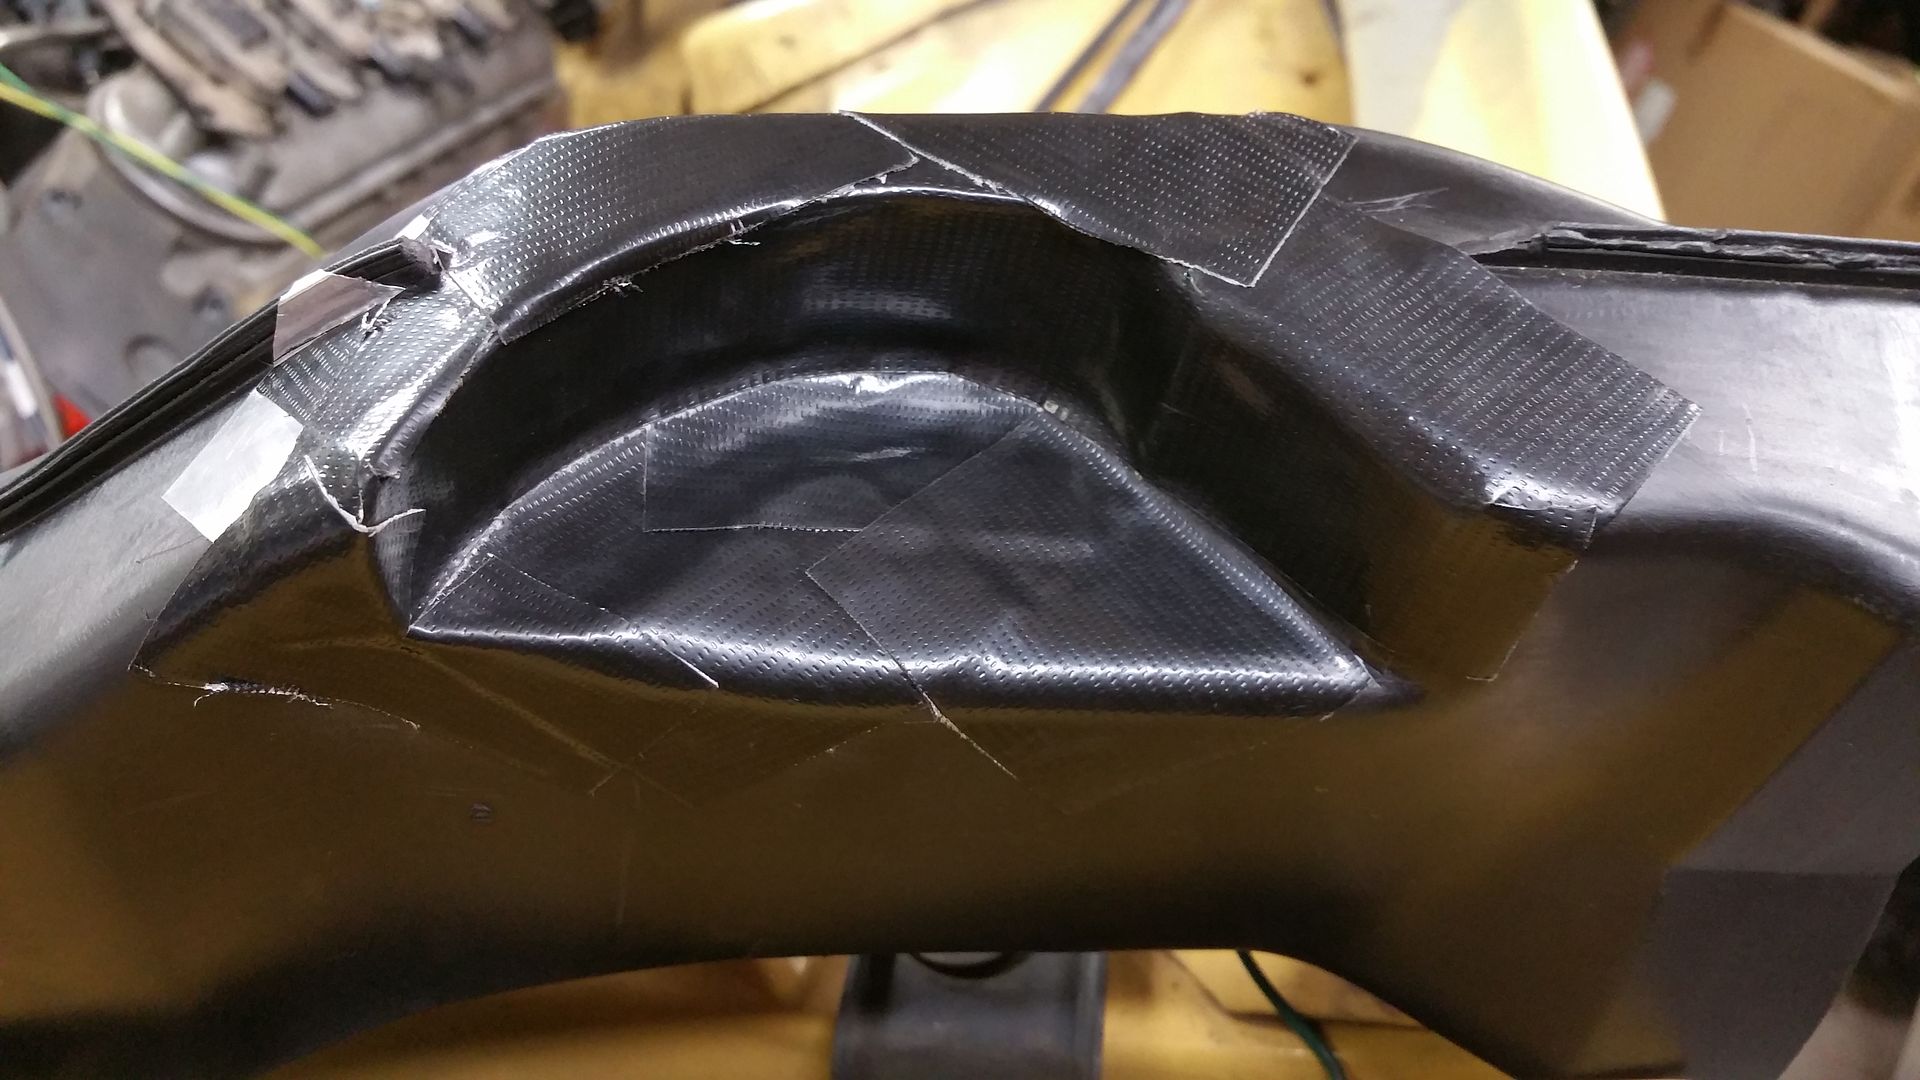
This weekend I got the air ducts cut for the Infiniti speakers up front. Just have to get some heating duct tape or something like that to close up the area I cut out. I pulled them out and cleaned up the cuts when I was done.
The heater control valve retaining clip broke so I got a 10-24 weld nut and a short screw to fix that. The control had been hard to use in the past, and this made it work very smooth afterwards. I understand why GM did it their way, but this should last a lot longer, lol. I used wicking thread retaining compound on the threads after I got it together so it won't spin. It would turn on the screw a little before I did that.
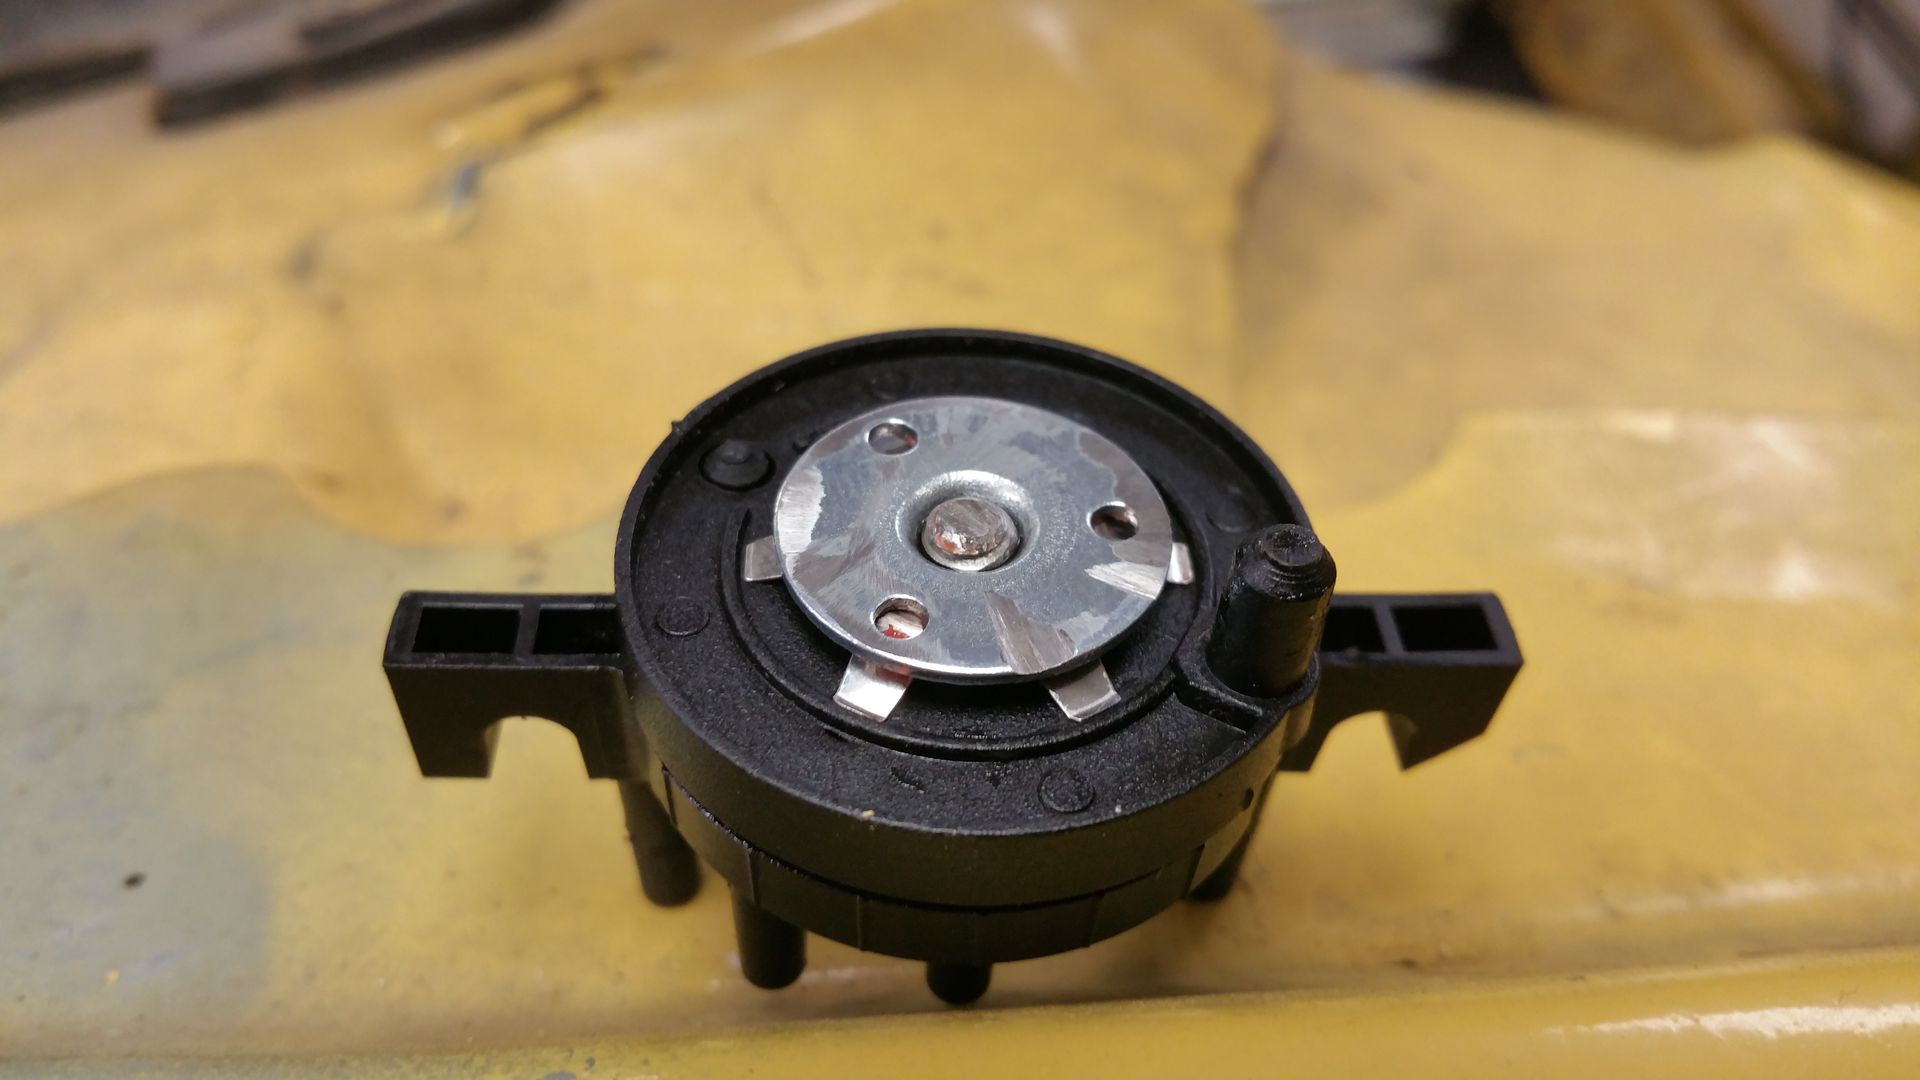
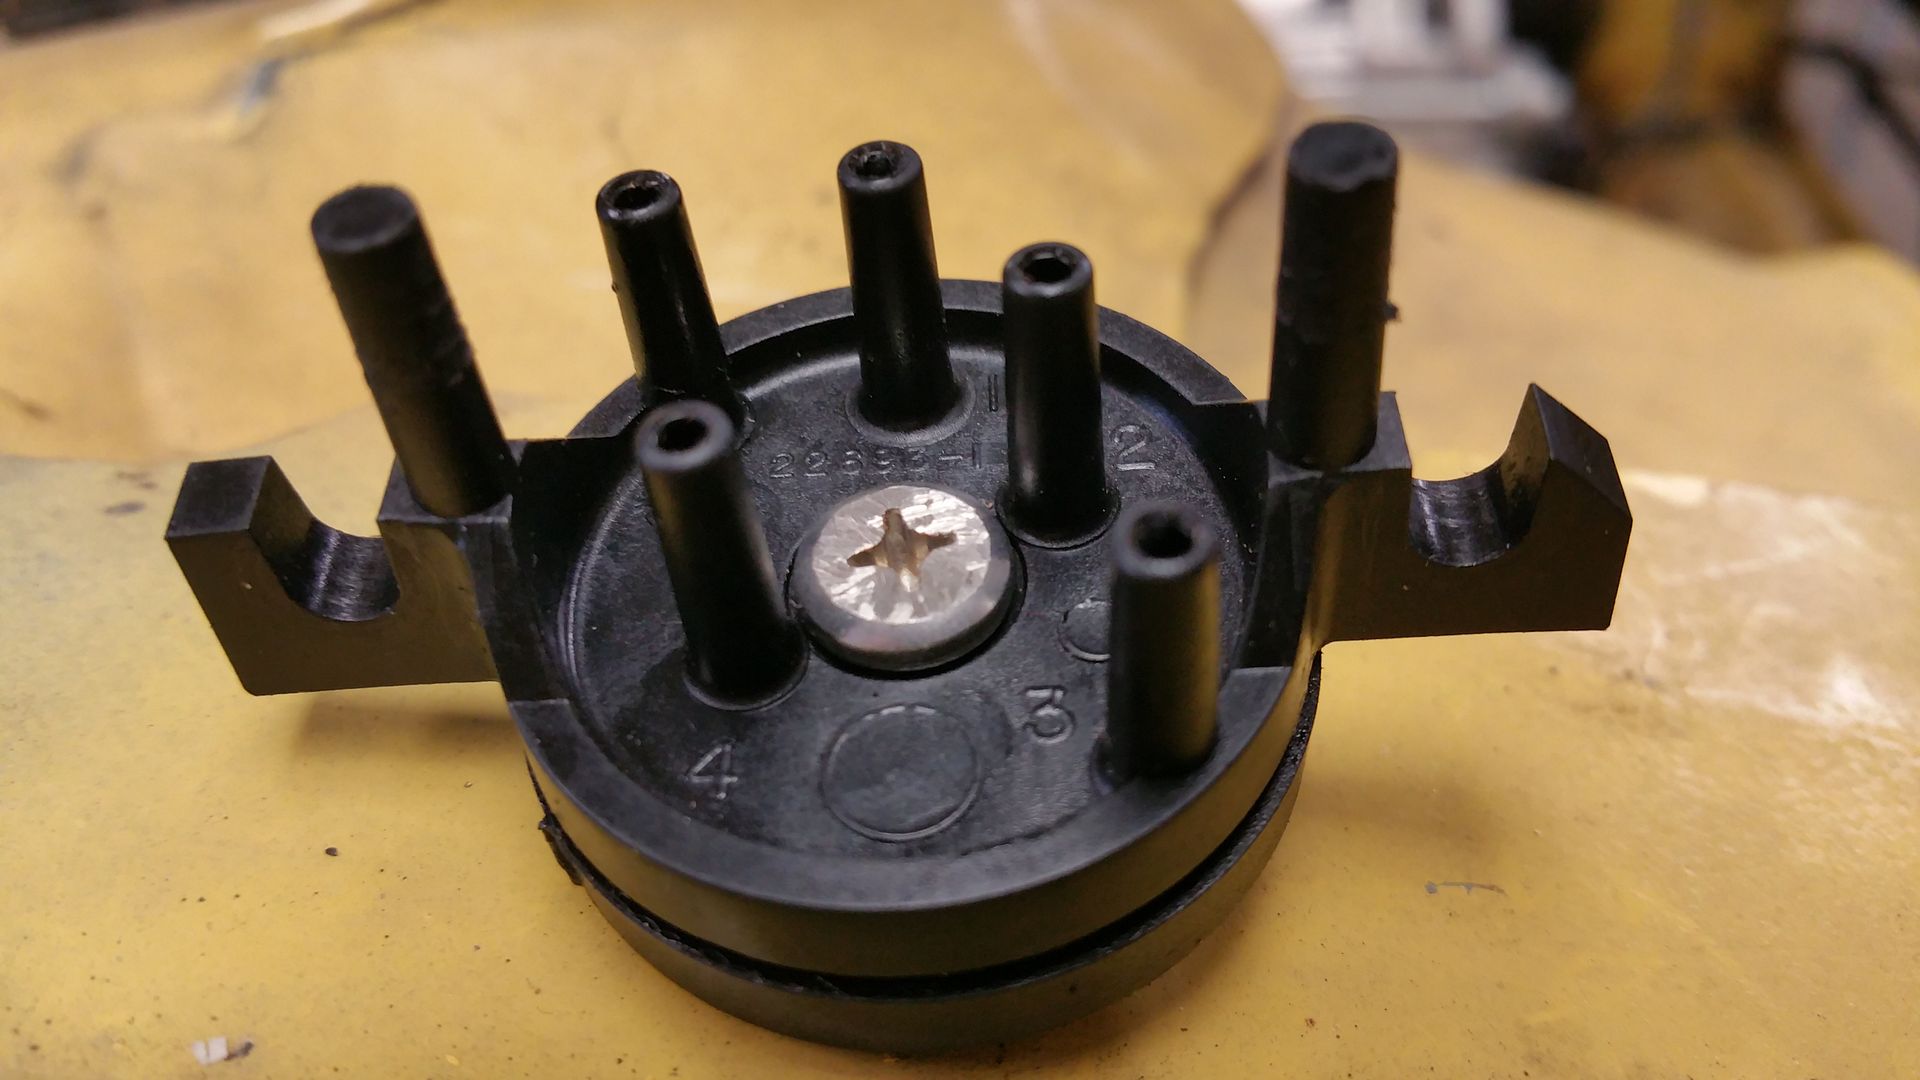
Along with the heater control I decided to mount my new heater core since the old one was nasty inside and I think weeped coolant a little. There is no way I could have done that with it still in the car because of the aftermarket core. It fit once I got it in, but the angle and placement of the tubes prevented me from getting it in with the box still mounted to the firewall. I wound up having to take the box halves apart to get the core and plastic mounting part in there. I hope to never have to do that job again.
I also pulled the reverse light wires and the starter relay wires out of the harness from the auto gear select and over to the C100. I also moved my alarm up to the top of the dash instead of just zip tied under the foot well and got the wires all ready to connect again. I also mounted a timed relay under the dash, when the alarm unlocks the door it will start the timer on the relay and it will light an LED strip that I will mount under the door handle for easy night-time viewing. I also mounted the express window module up on top of the dash since It seemed like the best place to put it for space and wiring, got the wires pulled, but not connected yet since I am going to buy new terminals for the window motors and run a heavier gauge wire than factory to try to get the windows to work a little faster.
Also got the hole cut for the clutch master and a reinforcement from a factory firewall all cut, cleaned and ready to be welded to the firewall.
Feels like I got nothing done this weekend, even though I was out there around 10 hours a day for 3 days  I got half of a bunch of other items completed too but flipping the dash over and then back to do all the wiring again and again was so time consuming. I did a few small things too, like cut the back of the auto gear selector off because it is one of the mounts for the console, cutting the hole in the floor for the shifter you lose two mounting holes for the console.
Last edited by PolarBear; 09-05-2016 at 09:29 PM.
|

|

|
 09-07-2016, 09:01 PM
|
#87
|
|
Ebearnezer Scrooge/Power Member/Lips
Join Date: May 2006
Location: Hamilton, Mercer county
Posts: 4,141
|
Got a little more done yesterday and today. last night I wired in my timed relay for the door lights, cleaned up some other wiring and mounted the relays to invert the signal for the door lock/unlock signal from the alarm.
Tonight I started making the harness for the ignition coils. I was going to use the stock coils that came with the truck, but as we know the number 8 hits the HAVC box. I bought an LS1 with extras from a guy I know and he included the coil setup for an LS4, those coils will work perfectly for not hitting the box or anything. One of the coil wires is cut so I just decided to make a new harness. That setup is cool because it has a plastic run/retainer for the wires behind the bracket, so you see less unsightly tape covered wire. I will be able to get away with a minor amount of visible tape, if I use any at all.
Also did a little hammer and dolly work on the LH front corner of the engine compartment near the battery tray. The car was in an accident at some point before I got it and that corner was crunched a bit and the previous shop didn't do anything to make it look nice. I think I did a pretty good job getting the damage out of it. There is some rust up there, so I didn't take a picture. I will abate the rust and probably epoxy prime over it since I will be doing some other spots anyway.
|

|

|
 09-07-2016, 10:36 PM
|
#88
|
|
10 Second Club / Meet Coordinator
Join Date: Dec 2004
Location: Roxbury, NJ
Posts: 2,109
|
you are on a roll with the work recently man! great progress, keep it up.
__________________
1987 IROC-Z - modified

|

|

|
 09-07-2016, 10:56 PM
|
#89
|
|
Ebearnezer Scrooge/Power Member/Lips
Join Date: May 2006
Location: Hamilton, Mercer county
Posts: 4,141
|
Quote:
Originally Posted by IROCZman15

you are on a roll with the work recently man! great progress, keep it up.
|
I really want to be close to drivable by the end of September, and now that this three month heat wave is almost over I can finally get some stuff done. I probably won't be finished by then, but I'd like to have the rust underneath fixed, sub frames welded in, floor painted, wiring harness done and engine back in the car by the end of the month.
Just have to go out there every night and get one or two small things done every night and I'll be there before I know it. I actually wrote it my list, but some things take some logistics planning so I don't have to undo and redo work.
The rust repair has me dreading that work though. I have a five/four day weekend this coming, so I think I can get pretty far on the total floor work by the end of it
|

|

|
 09-08-2016, 08:13 PM
|
#90
|
|
Ebearnezer Scrooge/Power Member/Lips
Join Date: May 2006
Location: Hamilton, Mercer county
Posts: 4,141
|
Pulled one exhaust manifold to get it ready to ceramic coat and figured while I have it off the car I'll gasket match the port. Not like it is going to gain me much, but it can't really hurt and it is fun to do. I am also going to grind all the casting flash off while I am at it. Only got 1 and a half ports done and some of the flash, but I only put about a half hour into it after I did some other stuff.
|

|

|
 09-11-2016, 09:11 PM
|
#91
|
|
Ebearnezer Scrooge/Power Member/Lips
Join Date: May 2006
Location: Hamilton, Mercer county
Posts: 4,141
|
I got my Furick cups for the TIG welder yesterday so I decided to weld up the Y pipe. These large torch cups are AWESOME! You do use a lot more gas though, but it is worth it with the amount of stick out you can have with the electrode. I got all but two joints finished, the TIG was starting to have some problems striking an arc as it was getting later. I told my friend who actually owns the welder and he found some info an what may be the problem. Apparently they use points for the high frequency and they can get fouled up or that part can break, but it is likely the points. I shut off the HF and was able to strike my arc with the scratch method, so when I get back to it, I will just scratch strike to finish it up.
I have to say, all the prep for TIG welding is time consuming. I had to grind some of my crappy tack welds down since I was doing overhead, in an awkward position when I was tacking up the pipes under the car. Also, I wanted to sand/smooth down all the joints and then clean them before I started TIGing. I probably spent almost 3 hours getting ready, then another 6 welding, moving the piece, re-positioning my purge setup. I understand why a good welder charges a lot for stuff like this and anyone who has ever said "X shops" stainless headers are overpriced has never done ANY TIG welding or fab,
|

|

|
 09-12-2016, 06:26 AM
|
#92
|
|
Meet Coordinator
Join Date: Jan 2008
Location: brick/pt. pleasant beach
Posts: 19,341
|
Pics!
|

|

|
 09-13-2016, 04:51 PM
|
#93
|
|
Ebearnezer Scrooge/Power Member/Lips
Join Date: May 2006
Location: Hamilton, Mercer county
Posts: 4,141
|
|

|

|
 09-13-2016, 04:51 PM
|
#94
|
|
Ebearnezer Scrooge/Power Member/Lips
Join Date: May 2006
Location: Hamilton, Mercer county
Posts: 4,141
|
|

|

|
 09-17-2016, 08:35 PM
|
#95
|
|
Ebearnezer Scrooge/Power Member/Lips
Join Date: May 2006
Location: Hamilton, Mercer county
Posts: 4,141
|
I pulled the heater/evaporator box off the firewall and repaired a few cracks in that. Then I painted it with SEM Trim black, and I masked off the stock Harrison sticker that says R12 on it, since I will be keeping the system R12 in the car. The Trim Black looks soooo good compared to the factory blah black plastic and the SMC/fiberglass bottom part. I'll try to get a picture of that tomorrow.
Here is one shot of covering the vent cuts that I made. First I used aluminum tape to give it a little structure, then I used Gorilla tape over it to try and make it more durable so it will last a good long time.
Also blasted my manifolds and the stock factory heat shields, then painted with Cerakote High temp. I treated the small screws with phosphoric acid to make them black and installed new studs for the Y pipe, coated all of them liberally with anti-seize before installing. I used Graphite black on the manifolds and Tungsten on the heat shields. Blasting, cleaning, then baking and painting took most of the day, just for one pair. I did the blasting on the other set during the week, so I just had to clean/bake and paint last night.
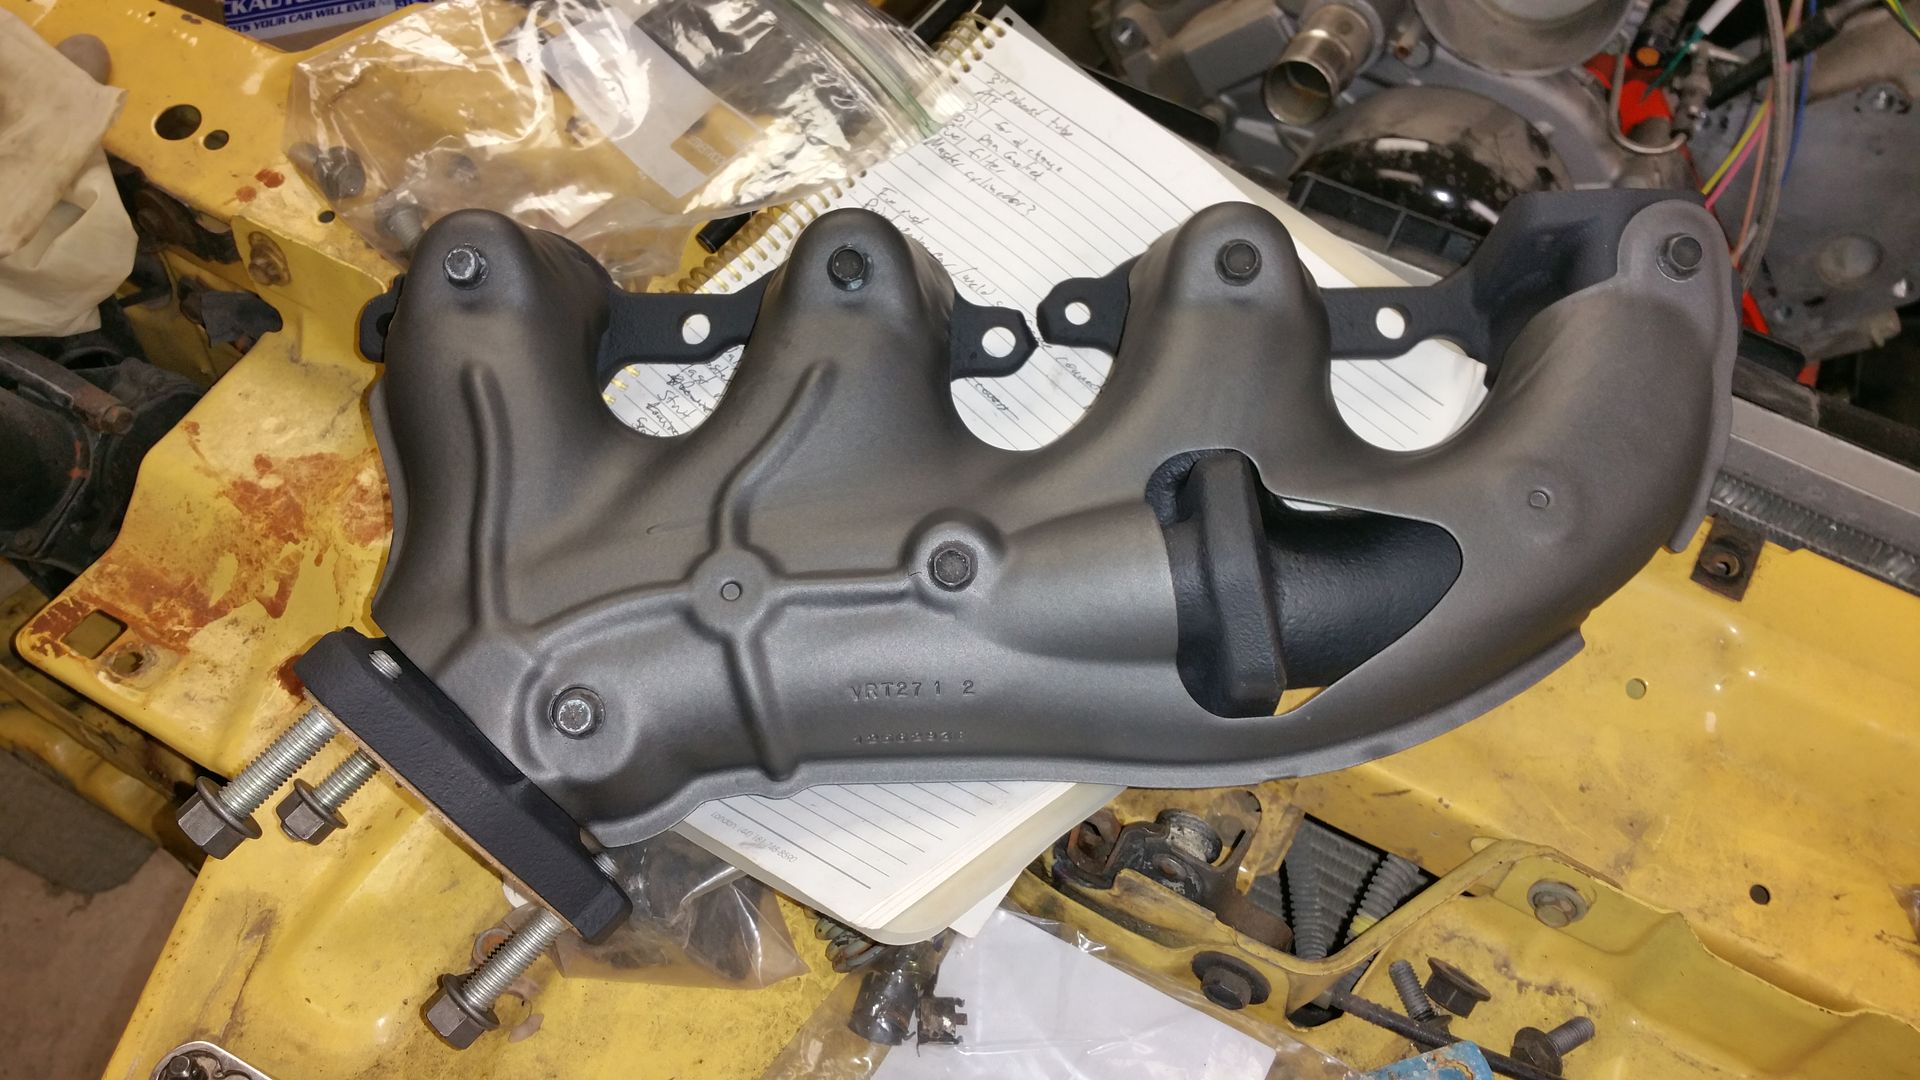
Tomorrow I will install the manifolds again and make sure my Y pipe still bolts up now that I welded it all up. If all is well with that I can move on to pulling the engine/trans back out so I can do the wiring harness, the rear engine cover gaskets, install the clutch hydraulic throwout bearing (and bench bleed it with the master) and get the oil pressure sender installed. I had put an aftermarket sender on the engine for the gauge in the other car it was installed in, but I can't get enough leverage to get the adapter off so close to the firewall. I also need to pull the crossmember off the engine and install the new stainless brake line for the front right brake.
After all that it is on to the dreaded rust repair and painting the underside of the car.
|

|

|
 09-17-2016, 08:48 PM
|
#96
|
Join Date: Aug 2007
Location: Piscataway, N.J.
Posts: 1,729
|
Very professional looking with a REALLY nice paint finish!
__________________
1991 FORMULA 350-GONE BUT NOT FORGOTTEN
1 of 1,197 with L98 Option/13.79@100 mph
1994 25th ANNIVERSARY TRANS AM GT -1 of ONLY 2,000 made/ Only 128 made with a HURST 6-Speed Manual and 91 with T-Tops and Compact Disc/ K & N Filtercharger/Magnaflow Performance Muffler/Air Foil- ORIGINAL MINT Arctic White Ultra Rare SURVIVOR. DAYTONA 500 PACE CAR Decal Kit!
SOLD: 1989 Turbo T/A in 1991 it ran 12:18@115 mph
|

|

|
 09-17-2016, 08:50 PM
|
#97
|
|
Ebearnezer Scrooge/Power Member/Lips
Join Date: May 2006
Location: Hamilton, Mercer county
Posts: 4,141
|
I got one run in that heat shield, you can see it in the picture, but I didn't have the gun set up properly. When I did the manifold I realized the gun was all wrong and that went on a lot better. The run doesn't bother me too much, no one will really ever see it but me.
|

|

|
 09-18-2016, 10:14 AM
|
#98
|
|
Ayatollah of Rock N Rolla / Admin
Join Date: Mar 2006
Location: Parts Unknown
Posts: 12,573
|
Quote:
Originally Posted by PolarBear

I got one run in that heat shield, you can see it in the picture, but I didn't have the gun set up properly. When I did the manifold I realized the gun was all wrong and that went on a lot better. The run doesn't bother me too much, no one will really ever see it but me.
|
Still looks really clean. Nice job!
|

|

|
 09-19-2016, 04:06 PM
|
#99
|
|
11 second club / Moderator
Join Date: Aug 2004
Location: West Berlin, NJ
Posts: 7,148
|
Incase for the future, a heat gun will make the ducts soft enough to mold around the speaker magnets
__________________
2001 Trans Am WS6 •SLP Loudmouth II •UMI Suspension •12.857 @ 109.57
1996 Trans Am WS6 •Pacesetter Longtubes •Strange 12 Bolt •Spohn Suspension •11.152 @ 123.85
|

|

|
 09-19-2016, 04:08 PM
|
#100
|
|
Ebearnezer Scrooge/Power Member/Lips
Join Date: May 2006
Location: Hamilton, Mercer county
Posts: 4,141
|
Yeah, maybe but I had to take quite a bit of material, this was easier since i have it all apart anyway. Maybe next time I will try it
|

|

|
 Posting Rules
|
You may not post new threads
You may not post replies
You may not post attachments
You may not edit your posts
HTML code is Off
|
|
|
|
|
|

