|
|
 04-27-2012, 05:51 AM
|
#26
|
Join Date: Jun 2006
Location: Ridgewood NJ
Posts: 648
|
Done yet?
BUWAHAHAHAHA!
__________________
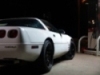
93 M6 vette
|

|

|
|
04-30-2012, 10:00 PM
|
#27
|
|
Stalker

Join Date: Aug 2004
Posts: 12,077
|
More mock-up pics...


|
|
|
|
|
05-01-2012, 09:08 AM
|
#28
|
|
Power Member / trans break does not equal transbrake
Join Date: May 2009
Location: The Meadowlands
Posts: 4,513
|
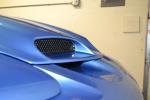
get that carbon fiber out of harms way !
__________________
99 Z28 - SBE LS1/60e
Motor - 10.84 @ 128 - 1.47 60'
Nitrous - 10.16 @ 132 - 1.40 60"
|
|
|
|
|
05-03-2012, 02:36 PM
|
#29
|
|
Stalker
Join Date: Aug 2004
Posts: 12,077
|
Just ordered a handful of metric bolts to finish mounting everything.
Also just ordered a new Griffin aluminum radiator, Vintage Air a/c condensor, Stewart Warner fuel press., oil press., and boost gauges, and low profile electric.
My next purchase(mid May) will include black IC piping, Intercooler, 55lb injectors, and some other small odd and ends.
|
|
|
|
|
05-03-2012, 03:08 PM
|
#30
|
|
Power Member/NJFBOA Bookie/Moderator
Join Date: Jun 2009
Location: North Jersey = Best Jersey.
Posts: 4,435
|
Nice! Any success sourcing a spare bumper?
__________________
 1995 Firebird... Stock-ish.
Quote:
Originally Posted by LS1ow

Good. He microwaved my phone 6 years ago, i hope his intake erupts.
|
|
|
|
|
|
05-03-2012, 09:44 PM
|
#31
|
|
Stalker
Join Date: Aug 2004
Posts: 12,077
|
nah, im gonna try to have the stock one work. I'll look into that more once i buy the intercooler
there is a clearance issue with part of the carbon fiber engine cover and the adjustable belt tensioner. seems a piece will need to be trimmed *cringe*
|
|
|
|
|
05-03-2012, 10:02 PM
|
#32
|
Join Date: Jul 2009
Location: barnegat nj
Posts: 1,340
|
Lay down the intercooler in a horizontal position.. looks to me you should have enough room. this way you just have to trim the underside of bumper cover which no one will see.
__________________
Quote:
Originally Posted by SRGN
I never pulled into the staging beams at the track and saw a dyno in the other lane.
|
South Jersey Racecraft
|
|
|
|
|
05-04-2012, 10:31 PM
|
#33
|
|
Stalker
Join Date: Aug 2004
Posts: 12,077
|
well, ran into another clearance issue between the S/C pulley and a bolt for the A/C bracket... solved it by recessing the bolt. Now I have more than enough room.
All hardware that I'm using for the mount is metric, so obviously I cant get Grade 8, so therefore I'm using all 12.9 grade. For comparison, Grade 8 is 150,000 psi tensile strength and 12.9 is 176,000psi. Additionally, Ill be using blue threadlocker since lock washers are useless with grade 12.9 bolts.

This weekend, I have to make 2 more spacers. I have a foot long piece of 7075 Aluminum round bar stock. I gotta cut 2 sections, both under 2" long, and then drill them down through the center. Should be fun, especially when I'm making them fit to 1/10,000th of an inch tolerance.
Last edited by V; 05-04-2012 at 11:10 PM.
|
|
|
|
|
05-08-2012, 09:44 AM
|
#34
|
|
Stalker
Join Date: Aug 2004
Posts: 12,077
|
Made the spacers but ran into yet another setback... lol. Once again just a clearance issue. I have to remake the main bracket to solve it. Not that hard only, 2-3 hours fab time, but I had to order another plate of 6061 Aluminum which should be here tomorrow.
On a side note, I'm pretty sure FedEx lost my new aluminum radiator somewhere in Nevada...
|
|
|
|
|
05-10-2012, 08:50 PM
|
#35
|
|
Stalker
Join Date: Aug 2004
Posts: 12,077
|
Radiator finally arrived, and boy does it look sick. lol. Its a Griffin Aluminum 2 row radiator. Yes, it has a little less surface area than stock but compared to the single row, 1" wide core of the stock rad, its is a huge improvement.
Next step is to make new mounting brackets to put it exactly where I need it to go now.


|
|
|
|
|
05-10-2012, 09:08 PM
|
#36
|
|
Meet Coordinator
Join Date: Jan 2008
Location: brick/pt. pleasant beach
Posts: 19,341
|
Dats nice
|
|
|
|
|
05-10-2012, 09:42 PM
|
#37
|
|
Stalker
Join Date: Aug 2004
Posts: 12,077
|
|
|
|
|
|
05-11-2012, 06:39 AM
|
#38
|
|
Power Member / trans break does not equal transbrake
Join Date: May 2009
Location: The Meadowlands
Posts: 4,513
|
were ya order your gauges from paul ?
__________________
99 Z28 - SBE LS1/60e
Motor - 10.84 @ 128 - 1.47 60'
Nitrous - 10.16 @ 132 - 1.40 60"
|
|
|
|
|
05-11-2012, 08:36 AM
|
#39
|
|
Ayatollah of Rock N Rolla / Admin
Join Date: Mar 2006
Location: Parts Unknown
Posts: 12,573
|
Is that single fan going to pull enough cfm for your engine?
|
|
|
|
|
05-11-2012, 09:16 AM
|
#40
|
Join Date: Jun 2007
Location: Arm pit of the world... NJ
Posts: 2,673
|
Quote:
Originally Posted by WildBillyT
Is that single fan going to push enough cfm for your engine?
|
fixed.
__________________
John
|
|
|
|
|
05-11-2012, 11:15 AM
|
#41
|
|
Stalker
Join Date: Aug 2004
Posts: 12,077
|
Quote:
Originally Posted by WildBillyT
Is that single fan going to pull enough cfm for your engine?
|
That pusher fan is replacing one of the dual fans(auxiliary) I had to eliminate from behind the rad. The main stock cooling fan will still be intact behind the rad on the left side.
|
|
|
|
|
05-11-2012, 11:16 AM
|
#42
|
|
Stalker
Join Date: Aug 2004
Posts: 12,077
|
Quote:
Originally Posted by LS1ow
were ya order your gauges from paul ?
|
I got them from Summit racing.
|
|
|
|
|
05-22-2012, 10:25 PM
|
#43
|
|
Stalker
Join Date: Aug 2004
Posts: 12,077
|
Quote:
Originally Posted by V
...ran into yet another setback... lol. Once again just a clearance issue. I have to remake the main bracket to solve it. Not that hard only, 2-3 hours fab time, but I had to order another plate of 6061 Aluminum.
|
Finally got a night free to work on this. I made the new bracket and clearance issue is now solved. Also added in an idler pulley to the bracket in order to route the belt better.
Who knows when I'll get around to doing more work on this though... lol
|
|
|
|
|
06-19-2012, 04:50 PM
|
#44
|
|
Stalker
Join Date: Aug 2004
Posts: 12,077
|
wow this is taking forever haha,
i guess i should work on it more huh? Today I fished all the spacers and whatnot in order to mount the head unit. I just have to put it on the car now and then run the I/C piping.
looks pretty huh?


|
|
|
|
|
06-19-2012, 08:05 PM
|
#45
|
Join Date: May 2012
Location: NJ
Posts: 143
|
Looks great, that attention to small things like making a bracket fit perfect will eliminate the nagging issues down the road, like belt rubbing under full load. Looking forward to seeing the completed project.
|
|
|
|
|
06-19-2012, 08:54 PM
|
#46
|
|
Lord of the rings / 10 Second Club / Meet Coordinator
Join Date: Aug 2004
Location: Millstone Township, NJ
Posts: 6,353
|
Shouldn't see any bracket flex there. Looks nice.
__________________
 97 T/A Ram Air Convt
Forever dyno queen / 777rwhp 662 rwtq @ 17lbs / 10.2 @ 140
'24 Corvette Z06
17 Sierra 2500HD Dmax
81 Turbo TA
|
|
|
|
|
06-19-2012, 09:30 PM
|
#47
|
|
Stalker
Join Date: Aug 2004
Posts: 12,077
|
I remember in a thread I made about a year ago, I mentioned possibly making my own bracket and stuff, and my fabrication skills and tooling available was brought up.... I think that question was answered now, lol.
The main plate is 3/8" 6061 aluminum, same thickness as the stock one, I also had to relocate 2 bolts further out because it was cause interference issues with where the alternator pulley will sit. To relocate them, I had to make that smaller bracket too.
The cylinder spacers are made out of 3/4" 7075 Aluminum rod that I cut and drilled to match the original ones. All measurements are down to .001"
The spacers that hold this all to the engine are made out of 1" 7075 aluminum rod I also cut and drilled. The ones that came with the kit were for an f-body so I was only able to use one of the 3 original ones.
All hardware is grade 8, the metric hardware which attaches this to the engine is all 12.9 grade.
Since I didn't want the idler pulley putting any stress on the bolt going into the s/c headunit, I put a 3/8-16 stud into the headunit, then a measured spacer, followed by a coupling nut. that nut tightens down onto the stud, providing the proper standoff, and then the idler pulley bolt screws into the coupling nut and locks the pulley down to the main plate itself.
The idler is a timing pulley for a ford 2.0L engine. Looks better on this application I think. I needed a idler with an outer diameter under 2" and this has a 1.8" diameter. The backside of the belt will ride on this and the belt will go on the inside of the bracket(not near that one close bolt head).
Now I just have to put this in place and then start building/putting the car back together from the front of the engine forward. I still have to make the custom a/c line ends, lower rad support, trim factory fan setup, layout I/C piping, buy I/C, and sleeve my fuse box for an I/C pipe.(gonna be interesting)... Then injectors and load it on my trailer and drag it off to get tuned...
Last edited by V; 06-19-2012 at 09:34 PM.
|
|
|
|
|
06-23-2012, 10:57 PM
|
#48
|
Join Date: Apr 2010
Location: Norwood, NJ
Posts: 59
|
just read this whole thread, had no idea you were doing this Paul. It looks amazing from what we've seen in the few pictures you have posted. I hope you found some time to work on it this weekend. Cant wait to see the final product and watch/hear it cruise around Bergen County.
__________________
1994 Z28 Black- CAI,Pacesetter LT,ORY,Magnaflow muffler, PCMforLess tune, Short throw, DD C5s- SOLD
2000 SS Artic White- SLP Intake, Pacesetter LT,TS ORY,SLP resonator, PCMforLess tune.-TOTALED
|
|
|
|
|
06-24-2012, 10:09 AM
|
#49
|
Join Date: Aug 2007
Location: Piscataway, N.J.
Posts: 1,729
|
I am very impressed with with way this has turned out, since you are building this from SCRATCH without blue prints or anything else to guide you along. Good luck with it working the way you hope it performs.
__________________
1991 FORMULA 350-GONE BUT NOT FORGOTTEN
1 of 1,197 with L98 Option/13.79@100 mph
1994 25th ANNIVERSARY TRANS AM GT -1 of ONLY 2,000 made/ Only 128 made with a HURST 6-Speed Manual and 91 with T-Tops and Compact Disc/ K & N Filtercharger/Magnaflow Performance Muffler/Air Foil- ORIGINAL MINT Arctic White Ultra Rare SURVIVOR. DAYTONA 500 PACE CAR Decal Kit!
SOLD: 1989 Turbo T/A in 1991 it ran 12:18@115 mph
|
|
|
|
|
06-24-2012, 04:16 PM
|
#50
|
|
Stalker
Join Date: Aug 2004
Posts: 12,077
|
Last edited by V; 06-24-2012 at 04:20 PM.
|
|
|
|
 Posting Rules
|
You may not post new threads
You may not post replies
You may not post attachments
You may not edit your posts
HTML code is Off
|
|
|
|
|
|