|
|
 02-07-2020, 12:29 AM
|
#1
|
|
10 Second Club / Meet Coordinator
Join Date: Dec 2004
Location: Roxbury, NJ
Posts: 2,147
|
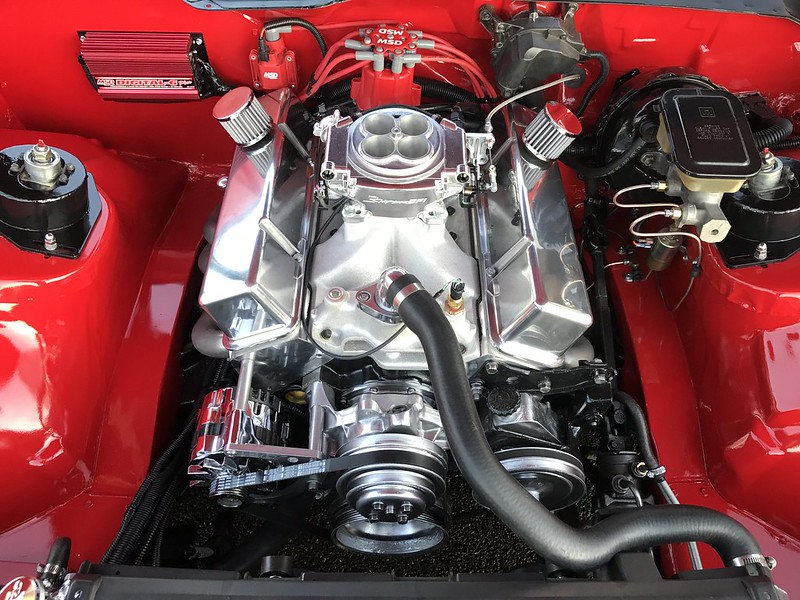
Getting my new 406 SBC installed, running, and driving
My engine arrived this afternoon!
Over the past few years (as most of you know) I have been building up my 1987 IROC-Z camaro to be a street/strip/autoX/show car. I have upgraded the fuel system, installed a very beefed up 700R4 trans, 9" converter, a Moser 12 bolt rear, strong driveshaft, suspension components, bigger brakes, wheels, a wet nitrous system on the TPI setup, battery relocation, etc. Here is a link to the multi-year build up of the rest of the car itself: http://www.njfboa.org/forums/showthread.php?t=68229 its 6 pages. lots of photos, info, and discussion.
It is finally time to bring in the engine, by which this new thread will be about....getting it installed, wired, plumbed, and setup. I have a pretty "ok" idea of what to do, but I also already have some questions and will need advice as I take on this task over the next few weeks. ANY/ALL advice (good or bad) is much appreciated. thanks
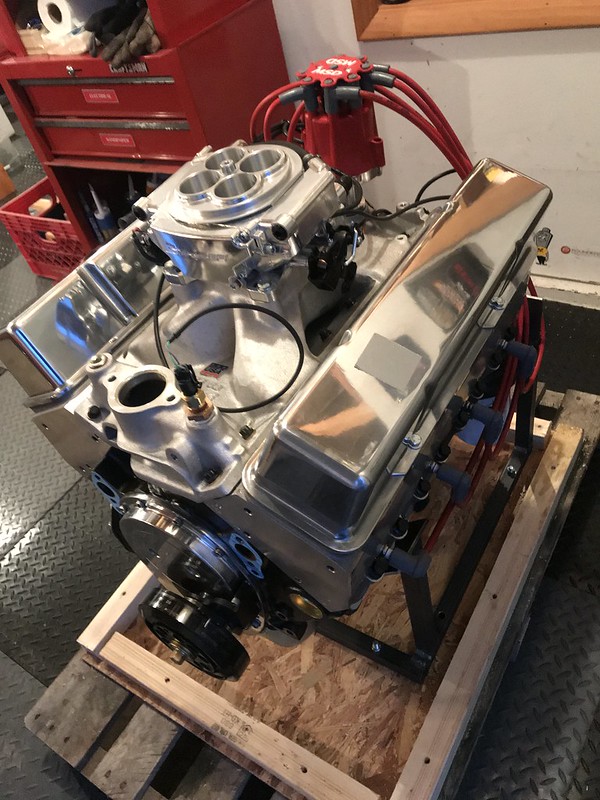
So the engine arrived today. It was built by Nyes Racing Engines out in Indiana.
Here are the basics, but I have attached a photo of the build sheet below:
- Dart SHP block
- 406 cubic inches
- Callies Compstar Crank and Rods
- Mahle pistons (rings are gapped for a 200-250 shot of nitrous)
- Dart Pro1 215 Cylinder Heads
- Comp Cams camshaft 245 intake/245 exhaust at .50, .4000 lift intake and exhaust, and 110 LSA (cam card below)
- Crane roller rockers
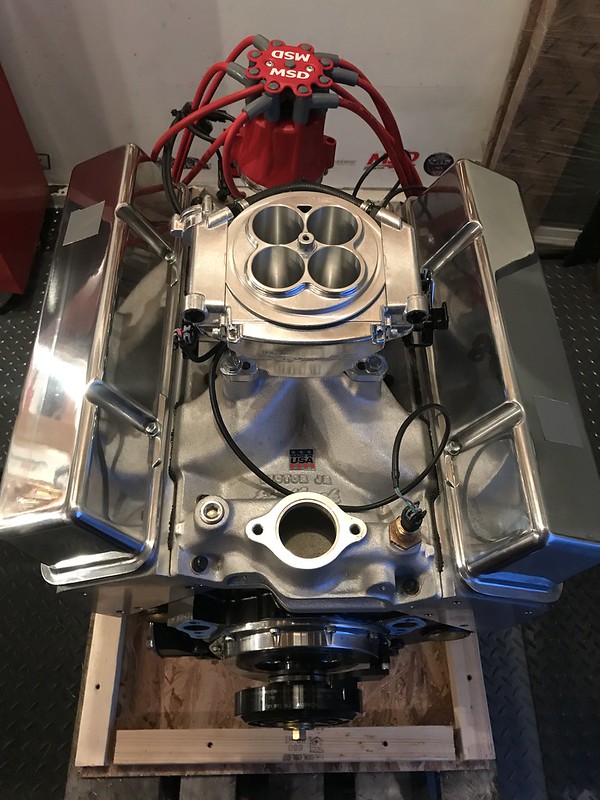
- Edelbrock Victor Jr manifold
- Holley Sniper EFI
- SFI 168 tooth flexplate
- MSD Pro billet distributor
Dyno Tested on February 2, 2020 (dyno printout attached)
Max HP was 531.6 @ 6,000 rpm
Max Torque was 513.0 @ 4,800 rpm
very happy with how it all went. I never wanted a super high horsepower high revving drag engine that was non-streetable. I always wanted a "hot-street" motor capable of doing "it all" well. street, strip, autoX, show, long cruises, etc. I'll take some time before getting the nitrous setup on it, but that is going to happen for sure
I plan on installing the engine in the car this saturday, and it will bolt to the new Prothane Polurethane engine mounts I installed. Today, I already mounted some of the front accessories (power steering pump, water pump, some pulleys) but I am still waiting on a mid-mount bracket set for the powermaster alternator. I also mounted the starter and did my best to check its alignment; see photo)
I have a champion 2 row (1" tubes) aluminum radiator on the way and will buy new hoses. A 160 degree thermostat was recommended by the engine builder, and I still need to buy a water neck. I will be re-using my OEM fans, but building my own relays to power them. The holley sniper unit will control fan 1 and 2 on/off. I will use evans waterless coolant also, and still have to find an expansion tank/overflow tank I can put neatly in the newly repainted engine bay.
- It took me a little while to understand the proper way to setup the fan relay diagram, but thanks to people on this board I think I have it worked out.
My biggest dilemma comes from some of the wiring that lies ahead.... I thought I had some of it figured out, but I seem to be getting into another confusing stage regarding the ignition wiring and some of the other topics below.....
Since I have removed ALL of the oem wiring that went to the TPI's ECM and its functions, I was left with wiring at the C100 connector, the C207, and the C221 along with the fuse panel, and in-car wiring. Things definitely cleaned up nicely under the hood and I wanted to do my best to keep it that way.
--I plan to use the Pink/black stripe wire coming from the fuse panels 10 amp ENGINE CNL port to trigger the sniper's ecm. (what does "CNL" mean anyways??) this pink/black wire used to go through port F of the C207 connector under the passenger dashboard but I removed it from the connector and plan on using it to connect to the new pink switched ignition +12v wire that leads to the sniper via it's built in connector? does this seem correct???
I thought that was the end of my ignition wiring questions, but sadly I realized when I did more reading that even though I own a MSD Digital 6 Cd ignition control box (currently removed and planned on selling it), I do NOT want to use it because on page 8&9 of the holley sniper quick start guide it states that "CD box ignition is intended for users that have an aftermarket ignition system but do not want the ECU to control timing". If I am reading that correctly, it means that the MSD digital 6 box would control timing, and would inhibit/prohibit the holley sniper from self-learning and self-tuning. ...
....thats not what I want. I want teh sniper to do the timing, tuning, everything. no external msd box is desired.
-- therefore, my only other option is for me to go buy a MSD remote mounted ignition coil (see page 8 of holley manual https://documents.holley.com/199r11193.pdf). Since I do not have a large cap HEI .... I have a MSD pro-billet distributor #85551, I will NEED to have a remote ignition coil right??? something like: https://www.summitracing.com/parts/msd-8202 or something different that works seamlessly with the MSD dizzy AND the holley sniper.. any suggestions? should I call holley tech on the phone and sort this out, or do you guys have any advice?
--after that dilemma, I then realized the issue might be even more complicated, since included with my Holley Sniper wiring harnesses, I located the "Holley Sniper EFI coil driver module".. which I had never heard of before today. this: https://www.summitracing.com/parts/sne-556-150 . so now I am getting more confused about what I need to get the ignition system proper, and next, how to wire it. I will be searching online and on the holley forums, maybe even a phone call.. but if anyone can point me in the right direction, that would be fantastic. I am confused, very much so.
the second (but probably not the last) issue I would like to resolve, is what the best method for fuel pump wiring would be. I currently already have the Racetronix FL98 wiring/relay kit in the car https://www.racetronix.biz/product.asp?ic=fpwh-005 and it is plugged into the oem bulkhead connector at the trunk area. So my plan was to keep this in place.... however the Holley sniper unit came with a pre-wired fuel pump relay and wiring!! so now I would have two relays for one 340 lph racetronix fuel pump. Initially myself and Polarbear decided that I should keep the racetronix relay and configuration, that would mean cutting up the brand new holley sniper wiring a bit, so before I do this, I wanted to see if anyone else had some thoughts or ideas?
- my gameplan would be, keep the racetronix wirign harness and relay in its entirety. I would then leave the OEM ground wire from the bulkhead to its chassis ground at the body under the rear seat. I would LEAVE the pink wire running along the drivers side rocker, since it goes to the dashboard fuel gauge, and I want that. I would keep the OEM tan wire along the rocker, but connect the sniper's "fuel pump trigger wire" to it, while then cutting out the sniper relay and its wiring?? if so, the schematic on page 14 of the quick start guide https://documents.holley.com/199r11193.pdf does not show the trigger wire to the fuel pump relay... it only shows the blue wire which would run from the relay to the pump. I will check my actual wiring harness tomorrow, but I think the sniper's fuel pump trigger wire to the sniper relay is pink?? if so, I would just connect that to the oem tan trigger wire at the rocker panel??
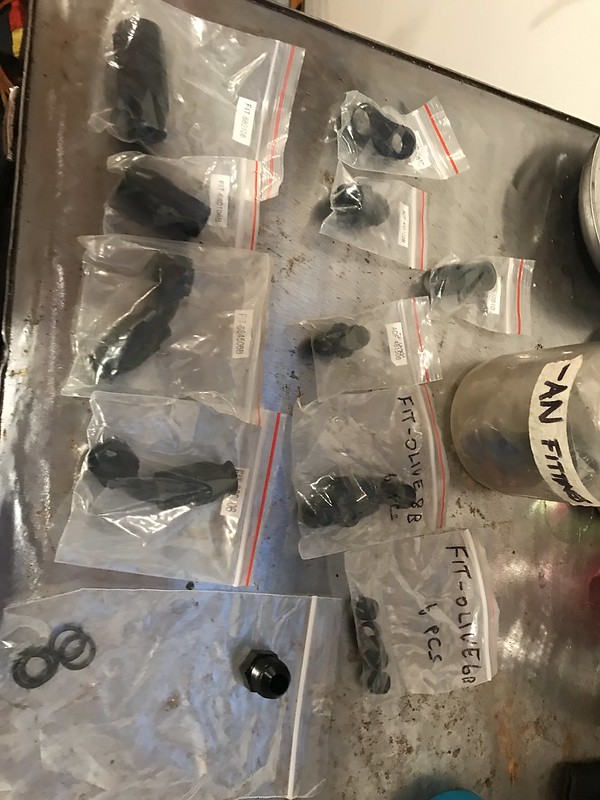
I still have to figure out fuel line fittings too, thats up to me basically. I need some -6 fittings and a -8 to -6 reducer as well. I might add in some 90 deg or angled fittings to keep the fuel lines neat where the enter the holley sniper at teh back-side. I wish the handheld display for the sniper showed fuel pressure as a display, but it does not. I think I will (eventually) add in a mechanical fuel pressure gauge at the sniper so I can occasionally visually check the fuel pressure. my only question here is: would the mechanical pressure gauge go on the return line after the sniper's built in regulator ??correct??
for header gaskets: I have DynoDon's 1 3/4" headers and he recommended the Remflex RFL-2007 header gaskets. I trust him, but the shape of the ports doesn't seem to really match the actual ports on my Dart Pro1 215 heads. I bought the gaskets, but is there a better option?
is there a better solution to mount my oil-pressure sender unit? I removed the stock one from my 87 TPI engine, and cleaned it up. .. but it certainly will NOT fit standing up vertically (and looks goofy), and it will probably crush into the firewall if mounted with the 90degree fitting like oem style. Is there a less bulky, more compact, simpler oil pressure sender that I can put into the oil port on the top of the block (under the distributor by the intake) ? any other solutions or parts that would work? is there a different oil passage/port in a dart SHP block I could put the oil pressure sender unit into?? it would connect ONLY to my oil pressure dashboard gauge, via the tan wire that goes through the C100. ?? otehrwise, if I do need to keep the bulky sender, I will get a proper angled fitting like https://www.ebay.com/i/153570139170?...RoC2LQQAvD_BwE
.. I am not really digging this orientation of the sender 
last question for now:
pertaining to valve cover breathers... engine builder told me its a non-pcv system which I like. If I end up needing a catch can later, so be it, but I should be fine with the no-nitrous use N/A setup for a while. So I am going to order some push in breathers for the valve covers. my question is, can I orient the valve covers(and breathers) to both be at the rear of the engine? it cosmetically looks "goofy" to have one breather rearward and the other one towards the front on each side of the engine? There are no baffles inside the valve cover, so I think that any "pressure/breathing" would be fine if both breather holes are at the back towards the firewall. is this incorrect? 
here are some photos.


hows this for starter tooth engagement?


even more photos can be found at this photo album link which I will add to as I take more photos: https://www.flickr.com/photos/iroczm...57713006026381
Sorry, a very long post. I hope to get some of this sorted out soon, and ANY advice is very much appreciated.
__________________
1987 IROC-Z - modified

Last edited by IROCZman15; 02-07-2020 at 01:42 AM.
|

|

|
|
02-07-2020, 08:03 AM
|
#2
|
|
Mongo the Meet Coordinator
Join Date: May 2008
Posts: 16,942
|
Well thats wall of text 
If the sniper is similar to my terminator, make sure your fuel pump is handled by the sniper fuel wiring/relay. In my case, my pump would not match well with Holley wiring, so I left the Holley relay alone and its output triggers my existing contacter for fuel pump.
In regards to the breathers, if you can run the covers so the breathers are up front that is best IMO. Breathers up front then hoses to the rear and a catch can or just pan evac em. Less chance of oil sloshing out of em under heavy accel.
The oil sender, check if your block has a pressure port above the oil filter, if it does, just toss your sender there.
__________________
Quote:
Originally Posted by KirkEvil

repo bigals turd gen and part it out to a loving home
|
|
|
|
|
|
02-07-2020, 08:33 AM
|
#3
|
|
Admin.
Join Date: Aug 2005
Location: Hamilton, NJ
Posts: 20,175
|
is there any sealant on that OPS? you should have plenty of firewall clearance to run it there but it may need to turn more. it might even fit as shown. A big cap HEI fits no issue.
I like to install all that extra stuff after the engine is in the car, but that's just me. less to break/scratch/get in the way, less weight, easier to move around. all that.
__________________
Vent Windows Forever!
The looser the waistband, the deeper the quicksand. Or so I have read.
Feather-light suspension, Konis just couldn't hold. I'm so glad I took a look inside your showroom doors.
Hey everybody, it's good to have you on the Baba-too-da-ba-too-ba-ba-buh-doo-ga-ga-bop-a-dop
|
|
|
|
|
02-07-2020, 12:38 PM
|
#4
|
|
Ayatollah of Rock N Rolla / Admin
Join Date: Mar 2006
Location: Parts Unknown
Posts: 12,573
|
Quote:
Originally Posted by BonzoHansen
is there any sealant on that OPS? you should have plenty of firewall clearance to run it there but it may need to turn more. it might even fit as shown. A big cap HEI fits no issue.
I like to install all that extra stuff after the engine is in the car, but that's just me. less to break/scratch/get in the way, less weight, easier to move around. all that.
|
I was going to say this too- I think the OPS should have sealant on it. If you can't find a smaller OPS I *guess* you could also use braided hose to relocate it.
Regarding the breathers, those valve covers do have baffles on them. I think you can probably run both in the back without issue. Only possible downside is that oil may get thrown back there during hard acceleration. With no PCV you might get a little bit of oil mist anyway.
Last edited by WildBillyT; 02-07-2020 at 12:40 PM.
|
|
|
|
|
02-07-2020, 01:42 PM
|
#5
|
|
Ebearnezer Scrooge/Power Member/Lips
Join Date: May 2006
Location: Hamilton, Mercer county
Posts: 4,141
|
The GTAs came with a 45* fitting for the oil pressure sender. That would help alleviate your issue with the spacing, but you could get any number of 1/8" NPT fittings to put the sender where ever you wanted and as far away as you want, you just need to be a little creative.
|
|
|
|
|
02-07-2020, 01:44 PM
|
#6
|
|
Admin.
Join Date: Aug 2005
Location: Hamilton, NJ
Posts: 20,175
|
Quote:
Originally Posted by PolarBear
The GTAs came with a 45* fitting for the oil pressure sender. That would help alleviate your issue with the spacing, but you could get any number of 1/8" NPT fittings to put the sender where ever you wanted and as far away as you want, you just need to be a little creative.
|
yup. mine runs to a T because i have 2 senders; 1 for the gauge and 1 for the factory idiot light.
__________________
Vent Windows Forever!
The looser the waistband, the deeper the quicksand. Or so I have read.
Feather-light suspension, Konis just couldn't hold. I'm so glad I took a look inside your showroom doors.
Hey everybody, it's good to have you on the Baba-too-da-ba-too-ba-ba-buh-doo-ga-ga-bop-a-dop
Last edited by BonzoHansen; 02-07-2020 at 01:44 PM.
|
|
|
|
|
02-07-2020, 05:24 PM
|
#7
|
|
10 Second Club / Meet Coordinator
Join Date: Dec 2004
Location: Roxbury, NJ
Posts: 2,147
|
cool thanks fellas!
just as a FYI, I had just simply placed that oil pressure sender in that location for the photo to show what i was talking about visually. Then I removed it; so that is whyI did not put any thread sealant. just for mock-up. I had not intended to install it until the motor is in place, because if that contacted the firewall during the engine install I would be pist that it scratched the new firewall paint. so after I took that photo, I put the OPS back into its plastic peanut butter jar storage container and its been on my parts shelf. --I might look for a 45deg fitting(s)to re-orient it later on. I talked to the engine builder today and he said if all else fails, I can get an adapter fitting and put it into one of the oil galley holes in the shp block, basically could also do as matt mentioned, use the hole near the oil filter, unless the sender housing would be in the way of the headers etc. I'll have to check once engine is installed.
-- but I do need it, and want it to work the dash gauge, so I do appreciate your advice and for noticing it had no thread sealant (yet).
also, today when I talked to Pat (engine builder) I asked about the valve covers. he said that if I was purely doing drag racing and hard acceleration driving he would want the breathers at the front of each valve cover. for "normal" street driving, its ok to have them staggered or to the back of the engine, but to be mindful of any oil mist escaping during hard acceleration and if that happens to move the breathers to the front. he again told me not to run a pcv system on this engine.
He suggested using the integrated Holley sniper fuel pump relay and bypassing the racetronix one. That poses a problem, because I would then have to drop the exhaust, rear axle, and perhaps the tank just to connect the sniper's long blue fuel pump wire to the wiring at the top of the fuel tank?? Its a heavier gauge wire than the oem tan wire, so I couldn't just splice it in.... I would have to run it all the way back to join the heavy wire leading to the racetronix fuel pump power wire at the fuel tank's bulkhead?? right? That sounds like a ton more work than me just removing the holley sniper fuel pump relay, and running the snipers fuel pump trigger wire to my oem tan wire, to the racetronix relay (which is already working and neatly mounted by the fuel tank). why would I not want to do this?? Am I missing something? Either way, one of the relays has to go away, and it seems less work to use my existing racetronix relay and wiring, as opposed to eliminating that and running more wiring and more connections by using the holley sniper relay setup. thoughts??
lastly, for the ignition questions, he informed me that I SHOULD use my MSD Digital6 CD Capacitive Discharge box with this engine. it will need the big spark power from it. Thankfully I did not sell it and it can be used, since it is an expensive part I would't want to have to buy now.
So I will have to call holley, or find the exact proper wiring schematic.... Pat said I will need the MSD box, the holley sniper, the msd distributor, and a msd canister style ignition coil (i'll still have to buy that). does this sound correct? what about that msd coil driver little gizmo? this ignition wiring/component topic is the area where I am currently MOST confused. I'm sure it will make sense to me soon, but just hasn't clicked in my brain yet. advice is appreciated
my current 9.5" torque converter is getting shipped back to Edge racing tomorrow and they are going to get it set up for a 3,500 stall speed or somewhere around there. he will run the numbers for real when he gets it in the mail, but today we quickly discussed my cam specs and engine combination and he agrees that I should have a better converter setup. Luckily I will save some money not needing to buy a brand new one.
__________________
1987 IROC-Z - modified
|
|
|
|
|
02-07-2020, 06:11 PM
|
#8
|
|
Meet Coordinator
Join Date: Jan 2008
Location: brick/pt. pleasant beach
Posts: 19,372
|
That little cool thing isn’t needed, they say so in the q&a below the item description ****
|
|
|
|
|
02-07-2020, 06:45 PM
|
#9
|
|
American Road Warrior

Join Date: Jul 2005
Location: Wastelands of NJ
Posts: 6,116
|
Real nice looking engine
__________________
unstable bob gable: LEGENDARY LEGEND,
ICONIC ICON, AND AMERICAN BAD AZZ!!!
1991 Dodge Spirit R/T: Gran'pa lookin' 150+ mph turbo rocket.
2013 Dodge Avenger RT: Wastelands cruiser.
2008 Crown Vic Police Interceptor: 'Nuff said!
THE ONLY THING THAT SUCKS WORSE THEN IMPORTS ARE RICED OUT IMPORTS!!!
|
|
|
|
|
02-10-2020, 12:53 AM
|
#10
|
|
10 Second Club / Meet Coordinator
Join Date: Dec 2004
Location: Roxbury, NJ
Posts: 2,147
|
I have been doing some research on the ignition wires, but not much yet because I was focused on getting the engine mounted in the car which would then allow me to start running fuel lines, wiring, radiator and hoses, etc. I will probably begin with the actual wiring later in the week.
On Saturday, I installed a 1gauge ground wire that connects both aluminum cylinder heads together. I will have another 1 gauge wire connecting the engine to the "framerail" and also another long 1 gauge cable going all the way back to the trunk at the battery's negative post.

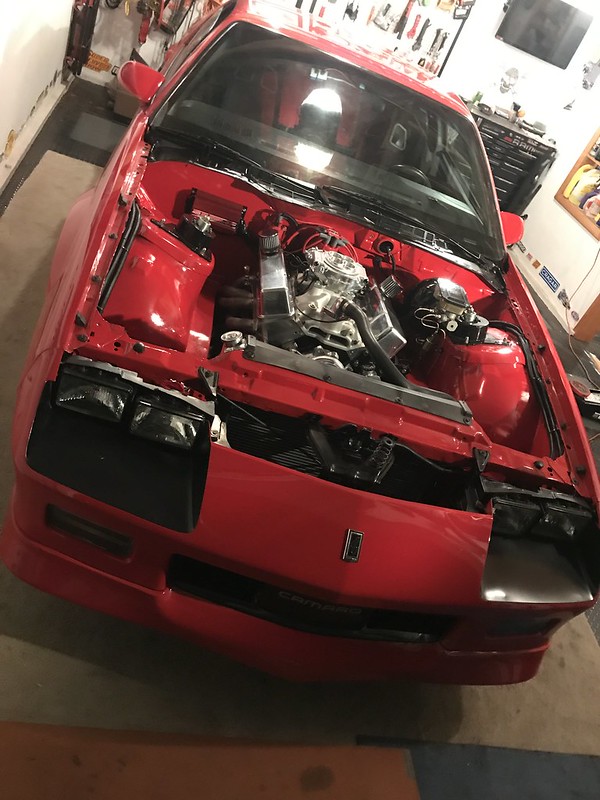
My dad came by after lunch Saturday and we rolled the car out into the driveway because my garage's height clearance would be too tight to get the lift's boom up high enough. Took the engine off the nice engine stand that Nyes racing built for shipping. Bolted up the upper motor-mount brackets and lifted the engine up, over, and down into position. Since I had nothing in the way, everything went really easy. The brand new poly mount on the passenger side gave us a very small amount of a hassle, but we got it done without any real frustration. torqued the motor mount through-bolts down, and rolled the car back into the garage.
I took a go-pro video during the install, but GoPro turned it into two videos?? any idea how I could combine them if I already added them to youtube:
video 1 (17 mins) https://www.youtube.com/watch?v=gk8L_JjOMqQ&t=732s
video 2 (3 mins): https://www.youtube.com/watch?v=YK0OFfX8UxU
---the video is fairly uneventfull, and I am not a youtube video personality, so it was really just me making a recording of the engine install as a memory with my dad etc. thats all.


Spent some time installing the new Champion American Eagle 2 row Polished Aluminum radiator. It has two 1" rows and is pretty much a direct fit, aside from some very minor trimming of the lower rubber mounting pads. I could not afford an $800 big name radiator, but have heard a good amount of things about this radiator, and the price was good too at $215 shipped. It has a nice billet cap-cover that I will put on later.


( I still need to find an overflow/expansion tank that I like and that will fit where I want it to go.. hmm also, the lower radiator hose shape will work, so I will buy a new rubber one of those(hopefully with that coil spring inside of it to keep it from collapsing. But my upper hose will not come close to working. I will have to order a new t-stat housing, and then find a way to get a rubber upper hose from the oem radiator location, to the new t-stat location. I am thinking that an oem shape.style hose for a third gen TBI car would work? thoughts? otherwise I will have to find a hose-building kit or something to work.
Next I was going to install the fans, but I noticed that one of the 4 lower fan mounting "ears" was cracked and would never survive on the road, so I have to order a new bracket and will install the fans later. I got the power steering lines installed (with teflon tape on the threads), and fiddled with a few other things.
Decided to use the racetronix fuel pump relay and will therefore be removing the holley one from the sniper wiring harness. Reason being, that the racetronix is mounted a short 18-20 inches away from the fuel tank/pump and it uses heavier 10 gauge wiring. Whereas, the pump relay setup in the holley kit mounts inside the engine bay area, and uses a smaller 12 gauge wire that runs under the car alllllll the way back to the fuel pump, where it would then also be a challenge to connect it to the appropriate pump power feed wire. PolarBear reminded me that the sniper ecm sends a negative ground signal to trigger the relay, as opposed to a positive trigger like the racetronix. He helped me learn how to change the polarity of the relay, and I reconfigured the wires to the racetronix relay and tucked it up and out of the way.


I will need to shorten my -8 and -6 fuel lines, since they used to go to the front of my TPI intake, and now they need to go to the rear of the holley sniper throttle body. So I am ordering a few fittings from racetronix. I think I will hold off on the mechanical fuel gauge for another time, and jut simply get the lines hooked up and secured.
One thing I came across in my ignition wiring research, is that in order to get the full benefit of self-learning and timing-control available with the holley sniper, I will need to lock-out my distributor. I am still new to this, but learned that it also requires me to make some changes in the sniper handheld, and to make sure my MSD CD box is configured properly. there are some Holley Youtube videos about this topic, so that is good. Holley recommends that if someone is installing an entirely new setup, to first not worry about the self-learning features, and just use the sniper as a TBI while letting the CD box, distributor, and coil handle the actual timing control. This is to ensure that everything else engine-wise is working properly. Then... Once I am ready to let the sniper take over full engine control, I make some wiring changes, handheld controller changes, MSD box changes, and remove the mechanical advance weights from the distributor. Then the MSD ignition box will simply supply big power to the coil and distributor, but the sniper ecm controls engine timing on its own and I can adjust things as I learn how to. Does this sound correct? This is not how I expected it, but after taking time to learn about it, this is how I think it works? Also, as Adam said, I will not need that little coil-driver device.. it is for "lower" horsepower/stock ignition setups. So, I looked around, and I THINK this is the diagram/schematic I will need to follow??

One question I have... is, can I use my MSD ignition coil that was on my car with the TPI setup? the box style one? or do I need to have a "canister" style ignition coil? I plan to call and ask holley tomorrow, it would be nice not to have to buy a new coil, because I have my TPI style one on my parts shelf. this one: https://www.summitracing.com/parts/m...xoC6WoQAvD_BwE . if needed, I'll buy one, but does anyone see a problem that I am not realizing?
thats it for now.


__________________
1987 IROC-Z - modified
Last edited by IROCZman15; 02-12-2020 at 11:44 PM.
|
|
|
|
|
02-10-2020, 07:02 PM
|
#11
|
Join Date: Jun 2005
Location: Morris County, NJ
Posts: 138
|
I hate wiring but love what you have done. Looks nice and clean.
|
|
|
|
|
02-11-2020, 06:27 AM
|
#12
|
Join Date: Mar 2011
Location: Morris County
Posts: 1,033
|
I think you may be confusing self learn and timing control. They’re two seperate things on the Sniper. You can
Set the Sniper to self learn seperately from having it control timing on its own. I installed Sniper on my dads car a couple years ago and never hooked it up to handle timing control. He wanted it to be simpler and didn’t want to lockout distributor. You will love it by the way. Good luck
__________________
94 Trans am 25th anniversary
86 Buick Regal T-type
73 camaro 454/T56 work in progress.
Last edited by grazi; 02-11-2020 at 06:28 AM.
|
|
|
|
|
02-11-2020, 09:21 PM
|
#13
|
Join Date: Oct 2008
Posts: 586
|
A tid bit on the OPS. Use one from a 68 GTO. PS157. Fits other applications as well. Reads same ohms as the PS155. 0-80 psi. Same thing just a shorter housing. Fits under HEI. Downside it cost a little more than the PS155.
Came across a great solution by accident. No fittings or crap. Just straight up sensor.
Had a 68 GTO in the shop while doing a Gaugemarks oil gauge install on an 80 Camaro. Thought the fitting method was hokey and went on to find a better solution which happened to be 10 ft away at the time.
Note: you may have to clearance the intake slightly depending how far the FNPT threads have been opened.
Last edited by TaKid455; 02-11-2020 at 09:23 PM.
|
|
|
|
|
02-12-2020, 07:10 AM
|
#14
|
|
Resident Camera Guy
Join Date: Aug 2004
Location: North Jersey
Posts: 10,971
|
Project is coming along nicely!
__________________

|
|
|
|
|
02-17-2020, 12:30 AM
|
#15
|
|
10 Second Club / Meet Coordinator
Join Date: Dec 2004
Location: Roxbury, NJ
Posts: 2,147
|
grazi: you are right. I was indeed merging the self-learning feature with the timing-control feature. my mistake. I am new to the EFi and tuning stuff. brand new. so I have a lot to learn, but thanks for your advice!
Larry: awesome, I will look into it. I was able to get a good angle/position with my current OPS configuration. it clears the firewall enough and it shows I have oil pressure on my dashboard gauge too. but if I need to redo the OPS, I will be sure to take your advice. thanks
Arock: thanks man. it is coming along indeed.

UPDATES:
got the fuel system finished up. the relay I finally decided to use was the racetronix one since it is nearby the pump, uses heavier gauge power wire, and was already installed by me a few years ago and has worked great ever since. I did have to remove the Holley FP relay from the brand new sniper harness. I also had to shorten my -8 feed and -6 return fuel lines and hook them up to the sniper. while I was at it, I replaced the magnetic fuel filter.

Got my new dipsticks, linkage cables, and bracket. also a mid-mount setup for the alternator. only some of these parts have been installed as of now

next, the headers were bolted on to the engine along with new Remflex header gaskets. the headers are DynoDon's 1.75" "mid length" headers. I had them on the old engine with the DynoDon's Y-pipe and knew they would fit so I plan to use these until I actually do need something bigger (probably when the nitrous gets hooked up)

Installed the Dorman lower radiator hose and bought a stainless steel coil/spring from Earls to help prevent it from "sucking itself closed" ever. Also a Dorman upper hose from autozone, but setup for 3rd gen TBI style mounting. it works, but maybe I will change to something fancier later on?

spent many hours stringing wiring together in the engine bay. My goal has always been to keep the visible wiring to a minimum. I like to run spark plug wires underneath the headers. Much of the other wiring also measured, cut, crimped and put in split-loom to be tucked under the headers. it took a while and my fingers are beat to hell from that and the braided fuel line work.


for the ignition system. I was able to find the proper schematic for what ineeded to do. The components are the holley sniper, MSD 85551 distributor, MSD digital 6 plus CD box, and a MSD ignition coil. last week I called Holley and asked if the ignition coil I had been using on my TPI setup would work, or if i needed a canister style. I was told hat my MSD Blaster 8226 (220 mili-amps) coil would work for now, but not for the big amps needed for nitrous. It was suggested that I could upgrade to the MSD 8207 coil which puts out 300 mili-amps, or even better, go to the MSD HVC-2 8253 coil (450 mili amps). thats a bit expensive, so I am not sure if I can do that right now, so currently, my MSD 8226 coil is what I am using. thoughts?
when everything is wrapped up, I will have to spend some time polishing the fresh red paint, and also the valve covers are coming off and getting a good hand polishing. they are getting a bit "used" already, but I will get them shining; thats for sure.
So...
my goal was to try to test-fire the engine by the end of this weekend. I checked over all the wiring, fuel lines for leaks, engine bay for loose tools and items, filled up 6 quarts of Valvoline VR1 20-50 racing oil (very thick oil!), added about 4 gallons of 93 octane fuel, and cranked it over.
It cranked for a second, coughed, and ran for 2 seconds. I was excited. So I cranked it again, and it fired up, ran (roughly) for a half a minute at idle (see youtube video) . I shut it off and noticed it was running very very rich. it even sneezed a bit of fuel through the sniper. I checked on the sniper handheld and opened the butterflies to let the intake vent out. cranked it over again about 10 mins later and it ran about the same, but still rich. lots of smoke and smell in the garage. but it ran! (alternator belt is a little loose, will tighten that) also, FYI it is just open headers for now, not even a y-pipe until I get the transmission back installed. I wonder if the o2 sensor is reading badly because of just an open header exit 2" away from the sensor?
short VIDEO: https://www.youtube.com/watch?v=DECdJ5YrwgU
so, I will have to look into the running rich issue. I will have to spend some time with the sniper tutorial, the handheld, and maybe call holley tech support to ask some questions.
I still need to finish wiring up the cooling fans/relays, and I have yet to install the actual throttle cable and bracket.
The torque converter is in California getting redone, and hopefully it will be back soon. then I can install the transmission and do a road-test.
__________________
1987 IROC-Z - modified
Last edited by IROCZman15; 02-17-2020 at 12:34 AM.
|
|
|
|
|
02-17-2020, 08:07 AM
|
#16
|
Join Date: Nov 2007
Location: Jackson, NJ
Posts: 1,752
|
Congrats! That's an exciting milestone.
Your O2 sensor is definitely reading poorly being that close to where the exhaust is exiting. Once you put the Y pipe on it will help a lot
__________________
1983 camaro- Scrap
1988 camaro- Also scrap
'05 Silverado- You guessed it, scrap
1988 TRX 250R- Ported w/ high compression on 110 octane- Out 60' your LT1
Jersey Shore Street Car Takeover (JSSCT) Founder
Quote:
Originally Posted by LS1ow
and once i get PHB, what do i ajust it too?
|
Quote:
Originally Posted by Jersey Mike
Seven.
|
|
|
|
|
|
02-17-2020, 02:58 PM
|
#17
|
|
Meet Coordinator
Join Date: Jan 2008
Location: brick/pt. pleasant beach
Posts: 19,372
|
Would the o2s even be reading yet? Not familiar with aftermarket stuff. I would think tune or timing issue first
|
|
|
|
|
02-17-2020, 07:40 PM
|
#18
|
|
10 Second Club / Meet Coordinator
Join Date: Dec 2004
Location: Roxbury, NJ
Posts: 2,147
|
I called Nyes racing engines today to ask Pat's thoughts. he agreed with me (and wretched73) that without a collector or y-pipe, the O2 sensor would be fooled and read crazy values, thus richening up the fuel mixture. This is what I thought also. It might be another week before the torque converter comes back, and before the transmission goes back in, so maybe I'll just bolt up the y-pipe, and the cat back exhaust and see if that changes how it runs and the rich air/fuel situation
Pat had the engine tuned up and the timing was set at the distributor (I have not checked anything with a timing light yet, but I will do so). I did try to make a "new run file" by setting the very basic parameters on the holley sniper in a new file, but did not get too into the setup/configuration just yet. before I do so, I should read and watch the setup tutorials.
__________________
1987 IROC-Z - modified
Last edited by IROCZman15; 02-17-2020 at 07:41 PM.
|
|
|
|
|
02-18-2020, 07:12 AM
|
#19
|
|
Meet Coordinator
Join Date: Jan 2008
Location: brick/pt. pleasant beach
Posts: 19,372
|
Did he say anything about running the motor with no load? Something my old school guys mentioned. I’m sure just a little idling and revs with no trans is fine but you should ask their opinion on it
|
|
|
|
|
02-18-2020, 08:31 PM
|
#20
|
|
10 Second Club / Meet Coordinator
Join Date: Dec 2004
Location: Roxbury, NJ
Posts: 2,147
|
next time I talk to him I will ask.
I wish I could put in the transmission, but I have to wait for the torque converter to be re-configured and shipped back to me. So I only ran the engine a short bit just to test the ignition wiring, and fuel system for leaks, and etc. I put a floor jack under the oil pan just to support the back end of the engine, but as you said.. there was no load/trans connected so I didn't get crazy with revving it up or anything.
The trans guru (Dana at ProBuilt Automatics) reccomended that I put ina few quarts of CAT transmission fluid along with my AMSOIL synthetic ATF) he says he recomends it for road race cars, autoX, and drag cars. I had never heard of this, but he says he has been doing it since the 1990's with great success. anyone thoughts?
https://www.ebay.com/itm/133300100305?ul_noapp=true
- I already bought a gallon, and I do trust the guy, but has anyone used this before?
__________________
1987 IROC-Z - modified
|
|
|
|
|
02-18-2020, 10:11 PM
|
#21
|
|
Mongo the Meet Coordinator
Join Date: May 2008
Posts: 16,942
|
The one I have heard of is JD tractor fluid, hyguard, and that is mainly for turbo cars that bump into the box to get boost up. It will handle heat better, but you usually read that it tightens up the torque converter.
Make sure you ask if the trans has the correct filter in the pan to run the different fluid, Hyguard comes with the recomendation of a brass mesh vs OE paper
__________________
Quote:
Originally Posted by KirkEvil
repo bigals turd gen and part it out to a loving home
|
|
|
|
|
|
02-19-2020, 07:28 AM
|
#22
|
Join Date: Mar 2011
Location: Morris County
Posts: 1,033
|
You can temporarily disable your 02 sensor with the handheld if you want to run it without the 02’s. I forget off the top of my head it’s all in the instructions. Do you have sniper controlling your timing yet or is it locked. May be better of locking it until you get it running right. Your timing almost seems a bit too advanced by how it was cranking. Looks good though!!!!
__________________
94 Trans am 25th anniversary
86 Buick Regal T-type
73 camaro 454/T56 work in progress.
|
|
|
|
|
02-19-2020, 11:37 PM
|
#23
|
|
10 Second Club / Meet Coordinator
Join Date: Dec 2004
Location: Roxbury, NJ
Posts: 2,147
|
Matt: cool. I rechecked with Dana and he said for all his transmission builds, he only uses the proper SPX "sealed power" filters that definitely work with the CAT fluid . he assured me that the trans will run cooler, live longer, and keep the planetaries alive if I do some on-track road course racing etc.
grazi: I forgot about disabling the O2 sensor! I may try it tomorrow. or, I might just bolt up the Y-pipe, it only takes a few minutes to do it. I haven't dug in too deep with the handheld sniper device yet.
- as for timing, I am not having the sniper control timing (yet) I want to have the car on the road and sort out any other gremlins I need to adjust before getting deeper into the ignition. So, currently the distributor is exactly the same as it was when the engine was built a few weeks ago. All I did was take the cap off real quick, and put it back on. It is a regular MSD 85551, with the advance springs and weights controlling the timing. My MSD box and coil supply the power. Actually, for curiosity sake, I should put a timing light on it one day once I have it running again.
Tomorrow I will setup the Lokar throttle cable and its bracket. I also will build the relays for the cooling fans and test/trigger them using the sniper handheld.
I spoke to Andre at Edge Racing Converters today on the phone. He had my converter cut open and cleaned up. He said all internal parts looked great, and there was minimal wear after 2 years of use. So, He looked at my cam specs, rear gear ratio, and we discussed that I want the car to be first and foremost a street car... but also be able to do a track day or autoX event. He is going with a 3,400 stall speed. The converter has anti-balooning plates in it. It will come with a renewed 2 year warranty. He knows I plan to spray some nitrous at it occasionally too, and that the nitrous will be ramped in progressively by the sniper unit.
I plan on using 4th gear TCC lockup still, but I am not sure if I am going to do it using a toggle switch (like I did for 2 years) or go with an automatically controlled kit. The trans builder recommended the painless wiring kit, but warned me that it is more expensive than most other kits. https://www.painlessperformance.com/webcat/60109 I can always add this later, so I am going to hold off for now, and probably just keep my manually activated toggle switch that I have been used to.
__________________
1987 IROC-Z - modified
|
|
|
|
|
02-21-2020, 12:12 PM
|
#24
|
|
Ebearnezer Scrooge/Power Member/Lips
Join Date: May 2006
Location: Hamilton, Mercer county
Posts: 4,141
|
You don't need half of that stuff from the Painless kit though, you would be wasting money buying it
|
|
|
|
|
02-22-2020, 11:41 PM
|
#25
|
|
10 Second Club / Meet Coordinator
Join Date: Dec 2004
Location: Roxbury, NJ
Posts: 2,147
|
PolarBear: yea the price seemed pretty high, and I am in NO real rush to have TCC lockup right away. Good to know that I can probably go with a more affordable kit that will do the job just fine. cool. thanks
converter is being shipped and should arrive this week. Then I can install it, install the trans, the trans fluid lines, new Lokar locking dipstick, Lokar TV cable, and the Dennys Driveshaft. hopefully that should get me a chance to do a road test.
I did begin to install the locking dipstick, and needed to drop the trans pan to do so. it clicks together and the lower part has a locking threaded portion design. it also comes with a click-in plug for if you need to take the trans out of the car or transport it etc.


I installed the Lokar throttle cable and its sniper bracket. I forgot to take a close-up photo of it installed, but it can be seen in other photos below

The coolant overflow/expansion tank arrived and I got it mounted up.

Spent a LOT of time running wires, tucking them in split loom after labeling them and building the relays for the two electric fans. I tested the fans too by changing the on/off parameters in the sniper handheld, and both fans turned on and off when I commanded them to; success! Since I have a 160 thermostat, the engine builder recommended Fan 1 come on at 190 and turn off at 160. Fan 2 come on at 210 and off at 280(***correction, I meant off at 180!! ) . With the high volume water pump, Evans coolant, big 2 core aluminum radiator, no AC, and intact air dam.. I am hopeful that I will not have any cooling problems.
It was nice out today so I pushed the car out in the driveway and some neighbors came by to check out my progress, and they helped me put the hood back on too. After that I gave the car a much needed wash and took some photos.


I am happy with the progress so far.
I will need to re-learn the car and what the new powerplant wants, and will have to work on not-frying the rear tires before adding in Lockup. My budget is getting diminished currently, and I was really hoping to be able to find/buy a nice set of wheels/drag radials or slicks. Also would still love to have the 6 point roll-bar done one day, somehow.

Now that the hood is on, I can get a proper measurement for an air cleaner/filter setup. I really don't think I am digging the typical round circle air filter for this car. I am kinda leaning towards the oval shaped look. I know its not typical 3rd gen fbody, but I am thinking it might look pretty good with the my under-hood components. something like:
https://www.summitracing.com/parts/ems-ms215-96p
or
https://www.summitracing.com/parts/ems-ms215-95ca
or
https://www.summitracing.com/parts/bsp-15420
or
??? thoughts??
took a short video walk-around
https://www.youtube.com/watch?v=7TBbf6jNX5w&t=1s
__________________
1987 IROC-Z - modified
Last edited by IROCZman15; 02-23-2020 at 07:17 PM.
|
|
|
|
 Posting Rules
|
You may not post new threads
You may not post replies
You may not post attachments
You may not edit your posts
HTML code is Off
|
|
|
|
|
|